Welding on a vehicle can be a bit nerve-wracking, especially if you’re not sure what to disconnect before getting started. If you don’t take the proper precautions, you risk damaging sensitive electronics, frying the ECU, or even creating a safety hazard.
I’ve seen people learn this the hard way, and trust me, repairing electrical components is way more expensive than taking a few extra minutes to prepare.
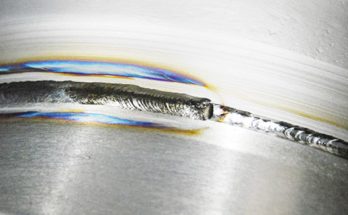
Image by linkertcarbs
Whether you’re fixing a rusted frame, adding custom brackets, or patching up body panels, it’s crucial to know what needs to be disconnected before striking an arc.
Let me walk you through everything I’ve learned about safely welding on a vehicle, from what to disconnect to the best safety practices to keep your car in good shape.
Why You Need to Disconnect Certain Components Before Welding
Modern vehicles are loaded with electronics. Unlike older cars, which had minimal wiring, today’s vehicles have ECUs, sensors, and computers controlling nearly every function. Welding can create electrical surges that may fry these sensitive components, leaving you with a costly repair bill.
By disconnecting the right parts, you’ll:
- Prevent electrical damage to the ECU, alternator, and battery
- Avoid sensor malfunctions that can affect vehicle performance
- Reduce fire risks by cutting off power to essential circuits
- Ensure a clean ground to prevent unexpected electrical paths
Now, let’s go over exactly what you need to disconnect before welding on your car or truck.
What to Disconnect Before Welding on a Vehicle
When welding on a vehicle, here are the most important components you should disconnect:
| Component | Why It Should Be Disconnected | How to Disconnect |
|---|---|---|
| Battery (Negative Terminal) | Prevents electrical surges from reaching the ECU and other electronics | Remove the negative cable using a wrench and isolate it from the terminal |
| ECU (Engine Control Unit) | The most sensitive electronic component; can easily be damaged by voltage spikes | Locate the ECU and unplug the main connectors |
| Alternator | Protects the diodes and voltage regulator from welding damage | Unplug the alternator or remove the wiring harness |
| Airbag System (SRS Fuses) | Prevents accidental airbag deployment due to electrical surges | Remove the fuse labeled “SRS” from the fuse box |
| ABS Control Module | Avoids damage to sensors and braking system electronics | Unplug the ABS module or remove the corresponding fuse |
| Radio and Audio System | Protects speakers and head units from electrical interference | Disconnect wiring from the back of the radio |
Each of these components is vulnerable to electrical surges, so taking a few minutes to unplug them can save you a lot of money and headaches.
How to Safely Disconnect the Battery Before Welding
The battery is the most critical thing to disconnect when welding on a vehicle. Here’s the safest way to do it:
- Turn off the ignition and remove the keys – This prevents any accidental power flow.
- Locate the battery – Usually found under the hood, but some cars have it in the trunk.
- Use a wrench to remove the negative (-) terminal first – This stops electrical flow before you remove the positive terminal.
- Insulate the negative cable – Wrap it with a rag or tape so it doesn’t accidentally touch metal.
- Optionally remove the positive terminal – While not always necessary, this adds an extra layer of safety.
Where to Attach the Ground Clamp When Welding on a Car
The ground clamp placement is crucial when welding on a vehicle. A bad ground connection can cause electrical current to travel through sensitive electronics, damaging the ECU and other components.
Here’s the right way to do it:
- Attach the ground as close as possible to the welding area – This prevents current from traveling through the rest of the vehicle.
- Use a clean, bare metal surface – Rust, paint, and dirt can create resistance, increasing the risk of electrical damage.
- Avoid grounding near sensitive electronics – Never attach the clamp to the engine, ECU housing, or any part with wiring.
I always take the time to find a solid metal spot close to my weld area, clean it with a wire brush, and clamp it securely. This small step makes a huge difference in protecting the vehicle’s electrical system.
Best Welding Techniques to Avoid Damage
Even if you disconnect everything properly, you still need to use good welding techniques to prevent overheating or warping parts of the vehicle. Here are some tips I follow:
Use Short Welds (Stitch Welding)
Instead of running a continuous bead, I like to weld in short bursts. This keeps heat input low and reduces the chances of warping thin metal panels.
Allow Time to Cool Between Welds
If I’m welding on a body panel or frame, I make sure to let the metal cool down between welds. This prevents excessive heat buildup, which can damage paint, wiring, or rubber seals nearby.
Keep the Ground Clamp Close
The closer the ground clamp is to the weld area, the less chance there is for electrical current to travel through the vehicle’s electronics.
Avoid Welding Near the Gas Tank
Welding near fuel lines or gas tanks is extremely dangerous. If I have to work near these areas, I either remove the fuel tank or use a fire-resistant blanket to block heat and sparks.
Common Mistakes to Avoid When Welding on a Vehicle
Welding on a vehicle isn’t too complicated, but there are some common mistakes that can lead to big problems. Here’s what you should avoid:
- Forgetting to disconnect the battery – This is the #1 cause of ECU failure when welding on cars.
- Using a bad ground connection – A poor ground can send electrical current through sensitive electronics.
- Welding near wires or fuel lines – Always move wiring harnesses and fuel lines away from the welding area.
- Overheating thin metal panels – Too much heat can cause warping, making body panels difficult to align.
- Not wearing proper protective gear – Welding sparks and fumes can be harmful, so always wear gloves, a welding helmet, and fire-resistant clothing.
Best Welders for Automotive Welding
If you’re looking for a good MIG welder for working on vehicles, here are some great options:
| Welder | Best For | Voltage | Wire Capability |
|---|---|---|---|
| Hobart Handler 140 | Beginners | 120V | 0.023” – 0.035” |
| Lincoln Electric Power MIG 210 MP | Versatile for multiple projects | 120/240V | 0.023” – 0.045” |
| Miller Millermatic 211 | Professional use | 120/240V | 0.023” – 0.035” |
Each of these welders provides great control and reliability for automotive welding projects.
Conclusion
Welding on a vehicle requires careful preparation to avoid damaging electrical components. By disconnecting the battery, ECU, alternator, and sensitive electronics, you can protect your car’s systems from electrical surges.
Always attach your ground clamp as close as possible to the welding area, use short stitch welds to control heat, and avoid working near fuel lines or wiring. These simple precautions can save you from costly repairs and keep your vehicle in great shape.
If you’re planning to do automotive welding, take your time, follow these steps, and you’ll have a safe and successful project.
FAQs
Why should I disconnect the battery before welding on a car?
Disconnecting the battery prevents electrical surges that can damage the ECU and other electronics.
Can welding damage my car’s computer?
Yes, if you don’t disconnect the ECU, an electrical surge could fry it, leading to expensive repairs.
Where should I attach the ground clamp when welding on a vehicle?
Attach the ground clamp as close as possible to the welding area on clean, bare metal.
With the right precautions, you can safely weld on your vehicle without causing damage. Happy welding!