If you’ve ever tried TIG welding aluminum, you know it’s a whole different game compared to welding steel or stainless. I still remember the first time I struck an arc on aluminum—it looked easy on video, but boy, did it challenge me.
Through trial and error, lots of practice, and tips shared by seasoned welders, I finally got the hang of it. And I can tell you, when you finally master the technique, there’s nothing quite like laying down a smooth, clean aluminum bead.
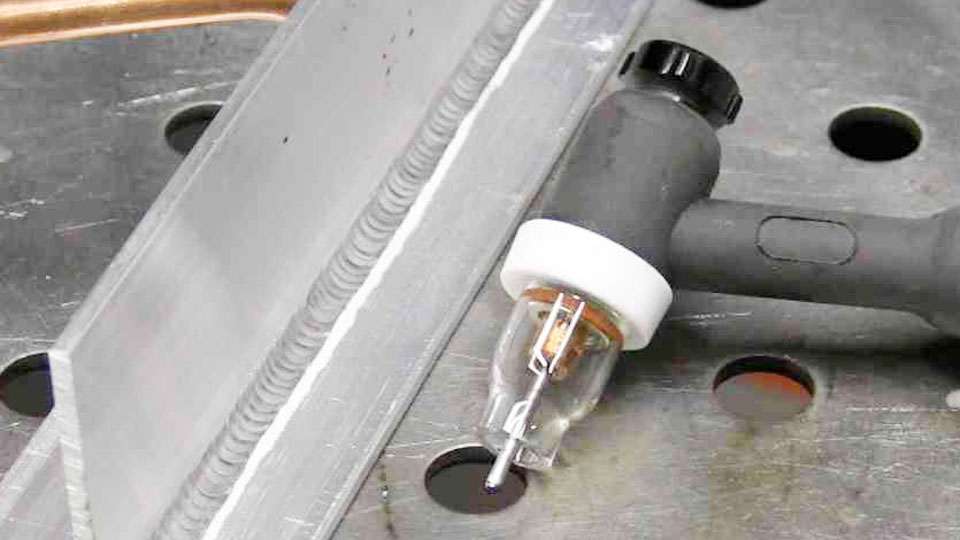
Photo by weldingtipsandtricks
I’m going to walk you through the best TIG welding aluminum tips and tricks I’ve picked up along the way. If you’re just getting started or want to take your skills to the next level, these insights will help you avoid common mistakes and get better results. Let’s get into it—no fluff, just practical advice from one welder to another.
Why TIG Welding Aluminum Is So Tricky
Before we dive into the tips, it’s worth understanding why aluminum behaves differently. Aluminum is soft, has a low melting point, and conducts heat like crazy. That means it heats up fast and melts even faster if you’re not careful.
Another thing is the oxide layer. Aluminum forms a thin layer of aluminum oxide on its surface. The tricky part? That oxide layer melts at a much higher temperature than the aluminum underneath it. If you don’t clean it off properly, it’ll mess up your weld every time.
But don’t let that scare you. With the right approach, TIG welding aluminum can be incredibly satisfying.
Use the Right Type of TIG Welder
Let’s start with the basics. Not all TIG machines are created equal. For aluminum, you need a machine that supports AC (alternating current). DC won’t cut it here.
AC is important because it allows for what’s called “cleaning action”—essentially, it breaks through that tough oxide layer while welding. I personally use a welder with AC balance control, which lets me fine-tune how much cleaning vs. penetration I get.
Look for a TIG machine that offers:
- AC balance control
- High-frequency start
- Pulse settings (optional but helpful)
- Adjustable pre-flow and post-flow gas control
The smoother the arc and the more control you have, the better your aluminum welds will turn out.
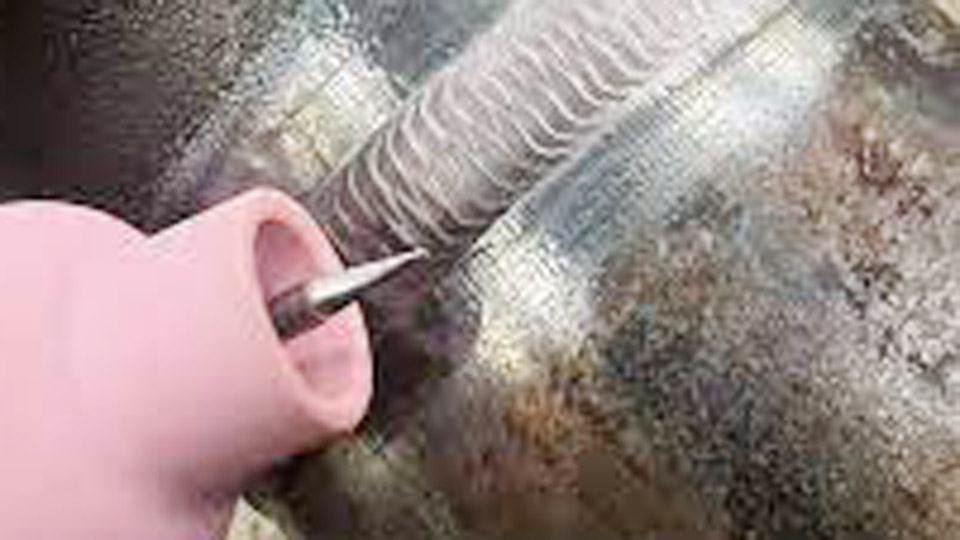
Cleanliness Is Everything
This is one of the most overlooked tips, but trust me, it’s a game changer. Aluminum has to be super clean before you weld it. Any contamination—oil, grease, dust, or even fingerprints—can create ugly welds or cause porosity.
Here’s my personal cleaning routine before TIG welding aluminum:
- Wipe down the surface with acetone or denatured alcohol using a lint-free cloth.
- Use a stainless steel wire brush (only for aluminum, not used on other metals) to remove the oxide layer. Brush in one direction.
- Re-wipe with acetone after brushing to get rid of the loose particles.
Also, make sure your filler rod is clean. A dirty rod can ruin an otherwise perfect weld.
Choose the Right Filler Rod
Picking the correct filler material is important. Most of the time, I use either ER4045 or ER5356. Each has its strengths.
Here’s a quick comparison:
| Filler Rod | Use Case | Strength | Notes |
|---|---|---|---|
| ER4045 | General-purpose, good flow | Moderate | Best for smooth-looking welds |
| ER5356 | Structural work, more strength | Higher | Slightly harder, more rigid bead |
If you’re welding something that’s going to take stress or needs extra strength, go with ER5356. For cosmetic work or thinner material, ER4045 is usually my pick.
Control Your Heat—Use the Foot Pedal
If there’s one tool you should learn to use well, it’s the foot pedal. Aluminum heats up fast and can suddenly collapse if you’re not watching.
The pedal lets you control the amperage on the fly, which is crucial when you’re trying to maintain a tight bead without burning through.
Start with higher amperage to get the puddle going, then back off slightly once it’s established. Adjust as you move through the joint. That control is key, especially on thinner materials.
Set the Right Tungsten and Cup Size
For TIG welding aluminum, I always go with pure tungsten (green) or zirconiated tungsten (white tip). Some folks use lanthanated (blue) with good results too.
Grind the tungsten to a rounded tip for AC welding. Unlike DC welding, you don’t want a sharp point here.
Also, use a larger cup size, around #6 to #8, and make sure your gas coverage is good. You should be running 100% argon for aluminum.
Use the Correct Gas Flow and Torch Angle
For TIG aluminum, I run my gas at about 15 to 20 CFH, depending on how drafty the area is. Shielding is everything—if you lose coverage, your weld will oxidize and look terrible.
Keep your torch angle between 10 to 15 degrees. Too much angle and your arc becomes unstable. Too upright and you can overheat the tungsten.
And always keep your tungsten about 1/8 inch away from the puddle. Too close and you risk contamination. Too far and you’ll lose arc control.
Master the Puddle—Don’t Rush It
This one takes time, but it’s what separates a decent weld from a great one. You’ve got to learn how to read the puddle.
When the aluminum starts to shimmer like mercury and the puddle gets shiny, that’s when it’s ready for filler. Don’t jam the rod in too early or too late.
Dip your filler rod smoothly into the front edge of the puddle, not behind it. And try not to “stab” the rod in. A smooth dab works better and keeps your rhythm steady.
Here’s something I always remind myself when welding aluminum: go slow to go fast. Rushing leads to mistakes.
Watch Your Heat Buildup
One of the sneakiest things about TIG welding aluminum is how the heat builds up. At first, it feels like you’re barely melting the material. Then suddenly, the part gets so hot it starts to droop.
That’s called heat soak, and it can make welding long seams difficult.
To deal with it:
- Use a chill block or backing plate (like copper or aluminum) to absorb heat.
- Take breaks if needed on large parts.
- Use pulse settings if your machine has them. Pulsing helps control heat input and improves appearance.
Practice on Scrap Before the Real Thing
This might sound basic, but I always warm up on a piece of scrap before touching the actual workpiece. It helps me dial in my settings and get into the rhythm of aluminum welding.
Especially if you haven’t welded in a while, practicing for even five minutes can make a huge difference.
TIG Aluminum Welding Problems and How to Fix Them
Here’s a quick table of common issues and what you can do about them:
| Problem | Cause | Solution |
|---|---|---|
| Porosity | Contaminated surface or filler | Clean thoroughly with acetone and use clean filler rods |
| Black soot | Poor shielding gas coverage | Check for leaks, increase CFH, or use a larger cup |
| Tungsten contamination | Touched puddle or filler | Regrind tungsten, keep steady hand |
| Cracking | Wrong filler or too fast cooling | Use proper filler, preheat thick pieces |
| Dull weld appearance | Wrong balance setting | Adjust AC balance to increase cleaning action |
Trust Your Eyes and Ears
This one might sound odd, but aluminum welding has a look and sound. A stable arc sounds like a soft hiss or hum. If it sputters or pops, something’s off.
Visually, a good aluminum weld looks shiny and smooth. If it’s dull, gray, or full of specks, you probably need to adjust your technique or clean better.
Trust your senses. Over time, you’ll develop that “welder’s instinct” and spot problems early.
Get Comfortable and Set Up Right
Before you even strike an arc, take a second to set up your space. I always make sure:
- My torch hand is supported (rested on a block or the table)
- The filler rod is within easy reach
- I’m sitting or standing comfortably to maintain consistency
If you’re fighting your body position, it’ll show in your welds. A relaxed welder lays the best beads.
Conclusion
Welding aluminum with TIG can feel intimidating at first—but it’s also incredibly rewarding. I’ve been through the frustration, the failed welds, the messy beads, and finally those proud moments when everything just clicks.
If you follow these tips and tricks, and you put in the practice, I promise you’ll start seeing better results. Don’t be afraid to experiment, but always go back to the basics when things go sideways.
Aluminum isn’t forgiving, but it is teachable. Learn its quirks, treat it with care, and it’ll reward you with clean, shiny, and strong welds every time.
So get out there, set up your machine, clean your parts, and lay some beads. Happy welding!
Frequently Asked Questions
What is the best TIG welding setting for aluminum?
Use AC current with high-frequency start, about 15–20 CFH argon gas, and a rounded tungsten tip. Adjust your amps based on thickness—around 1 amp per thousandth of material thickness is a good place to start.
Why does my aluminum weld look black or dirty?
That’s usually caused by poor shielding gas or contamination. Make sure the part and rod are clean, and check your gas coverage. Increase CFH if needed.
Do I need a different filler rod for every aluminum project?
Not always, but using the right filler for the job helps. ER4045 is great for most jobs, but ER5356 is stronger and better for structural welds.
Can you TIG weld aluminum without a foot pedal?
Technically, yes, but it’s much harder. The foot pedal gives you control over your heat input, which is essential for welding aluminum cleanly and consistently.
How do I know if I’ve cleaned the aluminum well enough?
The surface should be free of any oil, dirt, or shine from oxide. After wire brushing and wiping with acetone, it should look dull and matte. That’s when you’re ready to weld.