Let me paint a picture you might recognize. You’re trying to patch a rusted car panel or build a custom metal sculpture, but every time you strike an arc, the thin sheet metal warps like a potato chip or burns through like tissue paper.
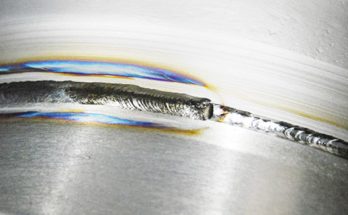
Image by reddit
I’ve been there—frustrated, covered in sweat, wondering why welding 1/16-inch steel feels like defusing a bomb. But after years of trial and error (and a few ruined projects), I’ve cracked the code.
Let me walk you through how to weld thin sheet metal without the drama, using techniques that actually work.
Why Thin Sheet Metal Is a Welding Nightmare
| # | Preview | Product | |
|---|---|---|---|
| 1 |

|
Lightweight Welding & Cutting Torch With Tips Sheet Metal Oxy Acetylene Gas | Check Price on Amazon |
Thin sheet metal (usually 24 to 18 gauge, or 0.0239 to 0.0478 inches thick) is unforgiving. It heats up fast, distorts easily, and burns through if you blink. Here’s why:
- Heat Sensitivity: Thin metal can’t dissipate heat quickly, leading to warping.
- Low Margin for Error: A half-second too long on the trigger = a hole.
- Fit-Up Challenges: Gaps or misalignment magnify heat issues.
I learned this the hard way restoring a vintage motorcycle fender. One wrong move, and I had to scrap the piece.
Essential Tools and Materials
You don’t need a $5,000 setup, but these items are non-negotiable:
- Welder: TIG for precision, MIG for speed. Skip stick welding.
- Thin Wire: 0.023–0.030 inches for MIG; 1/16-inch tungsten for TIG.
- Gas: 75% argon/25% CO2 (C25) for MIG; pure argon for TIG.
- Clamps and Magnets: To hold pieces flat and aligned.
- Heat Sinks: Copper blocks or aluminum bars to absorb excess heat.
I keep a $20 copper plumbing pipe from Home Depot as a heat sink—it’s a game-changer.
Preparation: The Secret to Success
90% of thin metal welding is prep. Skip this, and you’ll fight an uphill battle.
Clean the Metal
- Remove rust, paint, and oils with a flap disc or chemical cleaner.
- Wipe with acetone. Even fingerprints can contaminate the weld.
Fit-Up Tightly
- Gaps over 1/32 inch? Fill them with a backing strip or prepare for burn-through.
- Use clamps or magnets to hold pieces flush.
Tack Welds Are Your Friend
- Place tack welds every 2–3 inches to prevent warping.
- Let the metal cool between tacks.
I once rushed a project without tacking. The panel warped so badly it looked like a taco shell.
Choosing the Right Welding Method
Not all welders are equal for thin metal. Here’s the breakdown:
| Method | Best For | Pros | Cons |
|---|---|---|---|
| TIG | Auto body, art pieces | Precision, clean welds | Steep learning curve |
| MIG | DIY repairs, quick jobs | Faster, easier for beginners | More spatter, less control |
| Oxy-Acetylene | Vintage repairs | No electricity needed | High warping risk |
TIG Welding Thin Sheet Metal
TIG offers unmatched control for thin materials. Here’s how to nail it:
Settings
- Amperage: 1 amp per 0.001 inch of thickness (e.g., 20A for 0.020-inch steel).
- Tungsten: 1/16-inch, sharpened to a point.
- Filler Rod: 0.045-inch ER70S-2 for steel.
Technique
- Use a foot pedal to modulate heat.
- Weld in 1–2 inch segments, letting the metal cool between passes.
- Keep the arc length tight (1/8 inch max).
Pulse welding (1 pulse per second) reduced warping by 70% on a custom grill project.
MIG Welding Thin Sheet Metal: Fast but Tricky
MIG is less precise but great for beginners. Follow these steps:
Settings
- Voltage: 14–16V for 0.023-inch wire.
- Wire Speed: 150–200 IPM.
- Gas: C25 at 20 CFH.
Technique
- Use a “stitch welding” pattern: 1 second on, 2 seconds off.
- Hold the gun at a 10–15° push angle.
- Keep the nozzle clean to prevent erratic feeding.
Add a heat sink behind the weld zone. I’ve used everything from copper sheets to old frying pans!
Heat Management: The Art of Staying Cool
Controlling heat is the difference between a pro weld and a disaster.
Use Heat Sinks
- Clamp copper or aluminum blocks behind the weld area.
- Absorbs excess heat, reduces warping.
Skip Around
- Never weld in a straight line. Jump between tacks to distribute heat.
Cool Down
- Let the metal cool naturally. Spraying water risks cracking.
I once welded a patch panel on a car door without skipping—it warped so much the window wouldn’t roll up.
Post-Weld Care: Making It Pretty
Thin metal welds often need cleanup:
- Grind Smooth: Use a 120-grit flap disc for MIG spatter.
- Hammer and Dolly: Tap out minor warping.
- Body Filler: For automotive work, skim with filler before painting.
Troubleshooting Common Problems
- Burn-Through: Lower amperage, move faster, use a backing plate.
- Warping: More tack welds, skip around, use heat sinks.
- Porosity (Bubbles): Clean metal better, check gas flow.
FAQs About Welding Thin Sheet Metal
How thin is too thin to weld?
With TIG, you can weld up to 0.020 inches. Below that, consider brazing or adhesives.
Can I weld rusty sheet metal?
No—rust causes porosity. Grind to bare metal first.
What’s the best gas for MIG welding thin steel?
C25 (75% argon/25% CO2) for clean, stable arcs.
How do I prevent warping?
Tack every 2 inches, use heat sinks, and weld in short bursts.
Can I use a flux-core welder on thin metal?
Not ideal—too much spatter and heat. Use MIG with gas or TIG.
Why does my weld crack?
Rapid cooling. Let the metal cool naturally; don’t quench with water.
What’s the easiest welder for beginners?
MIG with 0.023-inch wire and C25 gas.
How do I fix a hole I burned through?
Let it cool, then weld around the edges inward. Patch with a scrap piece if needed.
Can I weld aluminum sheet metal?
Yes, but use AC TIG with pure argon and a high-frequency start.
Why does my TIG tungsten keep balling up?
Too much amperage or incorrect polarity. Use DCEN for steel.
Final Thoughts
Welding thin sheet metal is like baking soufflé—it demands patience and precision. Start with scrap metal, master your settings, and embrace the learning curve. My first clean weld on 22-gauge steel felt like winning the lottery. Yours will too.
Every warped panel or burn-through is a lesson, not a failure. Keep your torch steady, your metal clean, and your sense of humor intact.
Got a tricky project or a success story? Share it below—I’d love to hear how your welding journey unfolds!New chat