Welding thin metal can be a real challenge, especially when you’re just starting out or even if you’ve been welding for a while but haven’t had to deal with delicate materials. I remember the first time I tried to weld a thin sheet of metal, and before I knew it, I had blown a hole right through it.

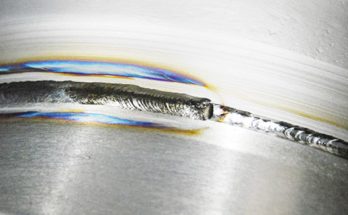
Image by reddit
It was frustrating, but over time I learned a few techniques that helped me avoid burning through and made the whole process smoother.
If you’re fixing a car panel, working on some metal art, or building a thin steel frame, getting your welds right without melting the material takes patience, control, and the right setup.
Let me walk you through everything I’ve learned about welding thin metal so you don’t have to go through the same trial and error I did.
Thin Metal and Why It Burns Through


Thin metal, usually defined as sheet metal around 16 gauge (about 1.5 mm) or thinner, is particularly sensitive to heat.
Because it doesn’t have the mass to dissipate heat quickly, it’s very easy to apply too much heat and end up melting a hole right through your workpiece.
The trick isn’t just to weld it but to weld it without compromising its strength or appearance. It’s all about balancing your heat, speed, technique, and setup.
Choosing the Right Welding Process for Thin Metal
One of the first things I learned is that not all welding methods are equal when it comes to thin metals. Some processes naturally produce less heat or offer more control. Here’s what I found most useful:
| Welding Process | Suitability for Thin Metal | Pros | Cons |
|---|---|---|---|
| MIG Welding | Great with adjustments | Easier to control, fast, good for sheet metal | Can still burn through if settings aren’t right |
| TIG Welding | Excellent for thin materials | Very precise, clean welds | Slower, requires more skill |
| Stick Welding | Not recommended for very thin metal | Good for thicker materials | Too much heat for thin sheets |
I usually reach for either MIG or TIG when working with thin steel or aluminum. MIG is quicker and easier for larger pieces, while TIG gives you that delicate touch for more refined or smaller projects.
Fine-Tuning the Heat Settings
Controlling the heat is everything when you’re welding thin metal. I’ve burned through so many panels in my early days just because I didn’t lower the settings. Always start low and gradually increase if needed.
Here’s what to adjust:
- Voltage and Amperage: Lower is better. For MIG, stay between 30-90 amps depending on the metal thickness.
- Wire Speed: Adjust your wire speed to match the amperage. Too fast and it’ll pile up; too slow and you’ll burn through.
- Pulse Settings (for TIG or MIG with pulse): Pulsing helps by delivering controlled bursts of energy. This gives the metal time to cool between pulses, which is a great way to prevent burn-through.
Selecting the Right Filler Material and Wire
The filler you choose matters more than people think. For thin sheet metal, I prefer using a smaller diameter wire or rod. It gives me more control and helps avoid overheating.
- For MIG, use 0.023” or 0.030” diameter wire.
- For TIG, go with 1/16” filler rod or smaller if you can find it.
Match your filler material to the base metal. For example, ER70S-6 is great for mild steel. If you’re working with stainless or aluminum, make sure your filler matches accordingly.
Use a Smaller Electrode and Nozzle
This might sound like a small thing, but the size of your electrode or welding nozzle can play a big role in how focused your heat is. Smaller components allow more precision.
In TIG welding, I often use a 1/16” tungsten electrode. It helps me maintain a smaller arc and apply less heat. With MIG, I stick to a smaller contact tip and a narrow nozzle.
Tack Weld First to Avoid Warping
Thin metals can warp easily. Before running a bead, I always tack weld the pieces in place. A few evenly spaced tacks around the perimeter will keep everything stable and reduce the risk of heat distortion.
Let each tack cool down before adding the next one. This might seem like it slows you down, but trust me—it saves you time in the long run by preventing mistakes.
Move Fast, But Stay Controlled
The actual weld needs to be quick and smooth. If you linger too long in one spot, it’s almost guaranteed that you’ll burn a hole.
What works for me is to:
- Use the “stitch welding” technique — short welds with pauses in between.
- Use backstepping — weld backward in small sections to distribute heat better.
- Or try “skip welding” — weld a few inches, skip a section, then come back later.
All these techniques allow the metal to cool as you work, reducing overall heat input.
Keep a Tight Arc Length
Arc length is the distance between your electrode and the metal. If you keep it too long, the arc becomes unstable and throws off extra heat. That’s not what you want.
Keep your arc tight—just above the surface. This gives you better control and helps keep your heat focused where it belongs.
Use a Heat Sink if Needed
If you’re working on very thin or valuable material, you might want to use a heat sink. I’ve used copper bars or aluminum backing plates behind the weld area. These absorb excess heat and reduce the chances of burn-through.
They also support the metal and help keep the backside of your weld smooth. I especially use them when working on automotive body panels or thin aluminum parts.
Clean the Surface Thoroughly
Clean metal welds better, and with thin metal, that’s critical. Any oil, rust, paint, or dirt will cause more spatter and poor arc stability, which can lead to you burning through without meaning to.
Use a wire brush, grinder, or even acetone (for aluminum or stainless) to clean the weld area before you strike the arc.
Practice on Scrap First
Even now, before I start welding on a project piece, I practice on some scrap metal of the same thickness. It helps me dial in my settings, get comfortable with the material, and avoid costly mistakes.
I’ll adjust my speed, angle, and wire feed until the weld looks good and I know I’m not going to blow holes through the actual piece.
Stay Patient and Take Breaks
This kind of welding takes time and patience. Rushing leads to burn-through or ugly welds. I often weld in small sections, then stop, check my progress, and let the material cool.
If the piece starts to feel too hot to touch even with gloves on, it’s probably time to step away for a few minutes.
Watch Your Angle and Technique
For MIG, I usually use a slight push angle, about 10 degrees forward, which helps with control and gives a flatter weld. For TIG, I keep my torch almost vertical with just a slight tilt, which gives me better visibility and stability.
Too much angle or inconsistent motion can cause uneven heat distribution and make burn-through more likely.
Use Proper Safety Gear
Just because the metal is thin doesn’t mean the safety risks are less. Always wear proper gloves, helmet, and a good welding jacket. Thin metal can produce more sparks, especially if you’re cutting or grinding.
Make sure your work area is clean and well-ventilated too. Burnt paint or coatings can release dangerous fumes.
How to Prevent Burn-Through in Thin Metal
| Key Factor | Recommended Approach |
|---|---|
| Welding Process | MIG or TIG preferred |
| Wire/Filler Size | Small diameter (0.023” MIG, 1/16” TIG rod) |
| Heat Settings | Low voltage, low amperage |
| Arc Technique | Tight arc, controlled speed |
| Cooling Support | Use heat sink or copper backing |
| Weld Technique | Stitch, skip, or backstep welding |
| Cleaning | Thorough surface prep |
| Practice | Always test on scrap first |
Conclusion
Welding thin metal without burning through is absolutely doable—it just takes a little extra care and the right approach.
From adjusting your settings and choosing the right wire, to using techniques like stitch welding and heat sinks, every small decision adds up to better, cleaner welds.
I’ve messed up plenty of thin metal welds in my time, but I’ve also learned how to fix those mistakes and prevent them from happening again. If you take your time, stay patient, and practice on scraps before the real job, you’ll get it right.
Once you master this, you’ll find it opens up a whole new set of projects you can tackle confidently—whether it’s automotive, art, or just DIY home repairs.
Frequently Asked Questions
What is the best welder for thin sheet metal?
A MIG welder with adjustable settings or a TIG welder is the best choice. They give you more control and lower heat, which is perfect for thin metal.
Can I use stick welding for thin metal?
Stick welding is not ideal for thin sheet metal. It produces too much heat and usually burns through easily. It’s better suited for thicker materials.
How can I fix a burn-through hole in sheet metal?
You can patch it by placing a small piece of scrap metal behind the hole and tack welding around it, then filling in slowly using short bursts to avoid more heat damage.
What causes burn-through while welding?
Too much heat, moving too slowly, or using a thick filler rod can cause burn-through. It usually happens when the metal can’t dissipate the heat quickly enough.
Should I use gas or no gas for welding thin metal?
Use gas shielding (like argon/CO2 for MIG) for cleaner, more controlled welds. Flux-core wire without gas tends to run hotter and may increase the chance of burning through.