If you’ve ever found yourself holding two steel rods and wondering how to join them together securely, you’re not alone. I’ve been there, with sparks flying, gloves on, helmet down, trying to get that perfect weld. And let me tell you—once you get the hang of it, welding steel rods can be one of the most satisfying skills to learn.
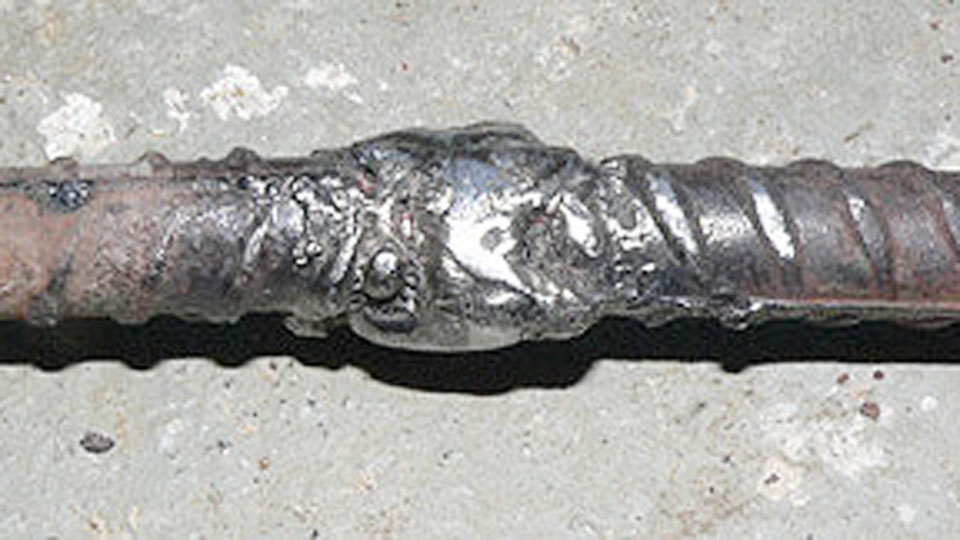
Photo by mig-welding.co.uk
If you’re building a small frame, doing repairs, or working on a DIY project at home or in your workshop, knowing how to weld steel rods together opens up a world of possibilities.
I’ll be honest—this process isn’t just about striking an arc and melting some metal. It’s about safety, technique, preparation, and choosing the right tools and method.
Let’s take a closer look at how to weld steel rods the right way, step by step, using language that’s easy to follow no matter your experience level. I’ll walk you through what you need to know like I’m right there beside you in the shop.
Basics of Steel Rod Welding


Before we even pick up the welder, it’s important to understand what you’re working with. Steel rods are cylindrical pieces of solid metal made from carbon steel, stainless steel, or even alloyed steel. Depending on the type, they may behave a bit differently when welded.
The most common steel rods you’ll likely be working with are mild steel rods. They’re affordable, easy to cut, and respond well to welding.
When welding two rods together, your goal is to create a strong, durable bond that won’t crack or break under stress. That means you need the right technique, the right settings, and the right prep work.
Tools and Equipment You’ll Need
Let’s talk gear. Having the right tools will make your job smoother and your welds stronger. Here’s a table to help break it down:
| Tool/Equipment | Purpose |
|---|---|
| Welding Machine | Provides the electrical current for welding |
| Welding Rods/Filler Wire | Adds material to create the joint |
| Angle Grinder | Cleans the metal surface before welding |
| Clamps | Holds steel rods securely in place |
| Protective Gear | Safety glasses, gloves, helmet, welding jacket |
| Wire Brush | Removes slag after welding |
| Measuring Tape/Square | Ensures proper alignment and measurements |
Pick your welding machine based on the process you’re using (more on that soon). A MIG welder is great for beginners, while stick welding is good for outdoor work. TIG welding gives a clean finish but takes more skill and time.
Choosing the Right Welding Method for Steel Rods
There are a few ways to weld steel rods together, but not all methods are equal depending on your needs. Here’s a simple breakdown of the three most common ones:
MIG Welding (Gas Metal Arc Welding)
This is one of the easiest methods to learn, especially if you’re new to welding. It uses a wire feed system and shielding gas to protect the weld from contamination.
I like MIG welding when working indoors with clean steel rods. It’s fast and efficient, and it doesn’t require changing rods every few inches. The downside is that it doesn’t work as well outside because wind can blow the shielding gas away.
Stick Welding (Shielded Metal Arc Welding)
This is great for heavier-duty projects or when you’re working outside. It’s not as clean as MIG or TIG, but it’s reliable and doesn’t need external gas.
Stick welding works well even on rusty or painted rods. If you don’t mind a bit more cleanup and want solid penetration, this might be your best option.
TIG Welding (Gas Tungsten Arc Welding)
This gives the most precise and clean welds. It’s great for thin rods or when looks matter. But it takes a steady hand and patience.
If you’re a beginner, TIG might not be the first place to start, but once you’re confident, it’s absolutely worth learning.
Preparing the Steel Rods Before Welding
Good welding starts long before you strike that arc. Here’s how I prep my rods:
Clean the Surface: Use a wire brush or angle grinder to remove rust, oil, or paint. Dirty metal creates weak welds.
Cut the Rods to Size: Use a metal saw or grinder to cut the rods to the exact length you need. Clean up the edges so they’re not jagged.
Position the Rods: Use clamps or magnets to hold the rods in place. You want them lined up straight and stable before you begin welding.
Tack Weld First: Apply small welds at the ends to keep the rods from shifting. This is especially helpful when welding long sections or tricky angles.
Taking time to prep properly will make everything easier. Trust me—I’ve rushed it before, and the results weren’t pretty.
Welding the Steel Rods Together Step-by-Step
Let’s get to the fun part. Here’s a general step-by-step guide I follow:
Step 1: Safety First
Always put on your safety gear—gloves, helmet, jacket, and safety glasses. Sparks fly, and UV rays can do real damage.
Step 2: Set Up Your Machine
Adjust the settings based on your material and welding method. For example, if you’re MIG welding mild steel rods, set the voltage and wire feed speed appropriately. Check your user manual or online guides if you’re unsure.
Step 3: Strike the Arc
Start the weld at the tack point. Keep your hand steady and move along the joint slowly. If you’re using stick or TIG, you’ll also manage the arc length and filler.
Step 4: Watch Your Bead
You want a consistent, even bead that fuses both rods without burning through. Keep an eye on the pool of molten metal—it tells you everything about how the weld is going.
Step 5: Let It Cool and Clean Up
After the weld cools down, use a wire brush or chipping hammer to remove any slag or splatter. This helps you see if you missed a spot or if a crack formed.
Step 6: Inspect the Weld
Visually inspect the weld for consistency. If it looks good, tap the rods or apply pressure to test the strength.
Common Welding Positions for Steel Rods
Sometimes you’ll need to weld rods in different positions. Here’s how they usually come up:
| Welding Position | Description |
|---|---|
| Flat | Easiest and most stable. Best for beginners. |
| Horizontal | Slightly harder but still manageable. |
| Vertical | Trickier—requires control to avoid drips. |
| Overhead | Most difficult. Take your time and stay safe. |
I always recommend starting in the flat position to practice your technique before tackling vertical or overhead work.
Tips for Stronger and Cleaner Welds
Over time, I’ve learned a few tricks that make a big difference:
- Keep your rods clean. Dirty rods or filler wire can mess up the weld.
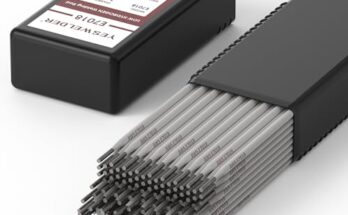
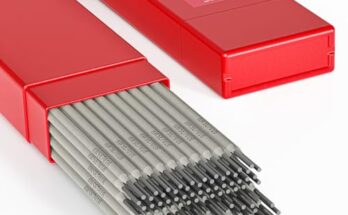
- Use the right rod type. For stick welding, 6011 rods are great for penetration, while 7018 gives smoother finishes.
- Maintain a steady hand. Don’t rush your welds. Move at a slow, even pace.
- Use both hands if possible. One for holding steady and one for guiding.
- Practice, practice, practice. The more you weld, the more natural it feels.
Troubleshooting Common Welding Problems
Here are some issues you might face and what they mean:
| Problem | Possible Cause |
|---|---|
| Porosity | Dirty metal or bad shielding gas |
| Cracks | Too much heat or rapid cooling |
| Undercut | Moving too fast or using high voltage |
| Weak weld | Poor penetration or wrong rod type |
Don’t get discouraged if something goes wrong. Welding is part art, part science. Every mistake teaches you something new.
What to Do After Welding
Once the rods are joined and everything looks good:
- Let them cool down fully before handling.
- Clean up the welds with a grinder if needed.
- Consider painting or coating the steel to prevent rust.
- Store your tools safely and inspect them for wear.
Welding is a hands-on skill, but it’s also about maintenance and good habits.
When to Avoid Welding Steel Rods Yourself
There are times when welding steel rods yourself might not be ideal:
- If the rods are part of a load-bearing structure and you’re unsure of your skills.
- If the rods are too thin and you’re burning through them.
- If you don’t have the proper ventilation or safety gear.
In these cases, it’s better to consult a professional or get some extra training. There’s no shame in being cautious—welding involves high heat and potential hazards.
You Can Do This—One Weld at a Time
Welding steel rods together might seem intimidating at first, but once you understand the basics and put in a little practice, it becomes second nature.
I still remember my first successful rod weld—it wasn’t perfect, but it held, and that sense of accomplishment stuck with me.
Take it slow. Get the right gear. Prep your materials. And always put safety first.
Once you get comfortable, the possibilities are endless. You’ll be building everything from gates to garden sculptures to repair jobs around the house.
Welding is not just about joining metal—it’s about building skills, creating strong structures, and finding satisfaction in a job well done. So fire up that welder and give it a go. You’ve got this.
Frequently Asked Questions
Can I weld steel rods with a small home welder?
Yes, many small 110V welders can handle basic steel rod welding, especially if you’re using MIG or stick welding. Just make sure your rods aren’t too thick for the welder’s capacity.
Do I need to use shielding gas for welding steel rods?
If you’re using MIG or TIG, yes, shielding gas is important to prevent contamination. For stick welding, the rods come with a flux coating, so no extra gas is needed.
What’s the best welding rod for joining steel rods?
For stick welding, 6011 or 7018 rods work well. For MIG, use ER70S-6 wire. For TIG, use a mild steel filler like ER70S-2.
How do I make sure my weld is strong?
Clean your metal, use the correct settings, hold a steady hand, and make sure you get good penetration into the metal. Test the weld once it cools by applying pressure.
Can I weld rusty steel rods?
You can, especially with stick welding using 6011 rods, but it’s always better to clean the metal first for a stronger weld.
Is welding steel rods safe for beginners?
It can be safe as long as you follow proper safety procedures—use protective gear, work in a ventilated area, and don’t take shortcuts.
Do I need to preheat steel rods before welding?
For most small DIY projects with mild steel, preheating isn’t needed. But for thicker or high-carbon rods, preheating can prevent cracking.