Have you ever needed to fix or build something with aluminum but didn’t have a welder? Don’t worry—you’re not alone. I was in that exact situation. I had a broken aluminum bracket on my lawn chair, and I didn’t want to go through the hassle of buying a welder or finding someone to do it for me.
I did a little digging, tried a few techniques, and learned that yes, it is absolutely possible to weld aluminum at home without a welder. And today, I’m here to walk you through everything I’ve learned from my own hands-on experience.

Image by red-d-arc
This guide is written for folks just like you—DIYers, hobbyists, or anyone who wants to get the job done right without investing in a full welding setup.
If you’re fixing something around the house or working on a small project, I’ll show you how to safely and effectively weld aluminum using simple methods.
Let’s dive right in and talk about how you can weld aluminum at home—even without owning a welding machine.
Is It Really Possible to Weld Aluminum Without a Welder?


Yes, it’s possible—but it’s a bit different from traditional welding. What we’re actually doing is called aluminum brazing or soldering, depending on the method.
These techniques use a lower temperature compared to welding and can be done with tools that most of us already have at home, like a propane torch or a simple butane torch.
You’re not melting the aluminum itself—instead, you’re melting a filler rod that bonds to the aluminum. It holds strong and looks neat, and with a little practice, the results can be surprisingly professional.
Tools and Materials You’ll Need
Let me first walk you through what you need to get started. You probably already have a few of these things lying around:
| Item | Purpose |
|---|---|
| Propane torch or butane torch | Used to heat the aluminum and melt the filler rod |
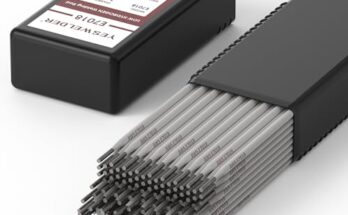
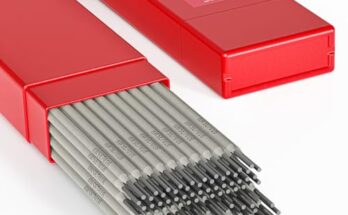
| Aluminum brazing rods (low-temp rods) | These are the magic sticks that hold your metal pieces together |
| Stainless steel wire brush | Used for cleaning aluminum surface before brazing |
| Sandpaper or file | To smooth the surface and remove oxidation |
| Clamps or vice | To hold pieces in place while you work |
| Protective gloves and goggles | Safety first! |
| Heat-resistant surface or firebrick | A safe work area is essential |
Once you’ve gathered everything, you’re ready to move on to the actual process.
Understanding Aluminum: Why It’s Tricky
Aluminum is a little sneaky when it comes to heating. It doesn’t glow red like steel, and it has a low melting point—about 1,221°F (660°C).
Aluminum forms an oxide layer that melts at a much higher temperature than the base metal itself. This oxide layer can prevent a strong bond unless it’s removed.
That’s why cleaning is a crucial step. Skipping it will lead to weak joints or failed bonds. Think of it like painting over a dirty wall—nothing sticks.
Step-by-Step: How to Join Aluminum Without a Welder
Let me walk you through the steps I followed when I fixed that broken chair bracket. It’s a simple process, but it does require patience and practice.
Step 1: Clean the Aluminum Thoroughly
Use sandpaper, a file, or a stainless steel wire brush to scrub away any oxidation, paint, or grease. The surface needs to be clean and shiny. I always brush the area right before I heat it to make sure no new oxidation has formed.
Step 2: Position Your Parts
Use clamps or a vice to hold your aluminum parts in place. It’s important that they don’t move around while you’re heating and applying the filler rod. Any shift can weaken the bond.
Step 3: Heat the Aluminum Evenly
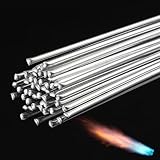
Now it’s time to grab your propane or butane torch. Heat the aluminum, not the rod. Move the flame back and forth to spread the heat evenly. Don’t focus on just one spot, or you’ll risk melting the aluminum before you’re ready.
Step 4: Apply the Brazing Rod
Once the aluminum is hot enough, touch the rod to the joint—not the flame. If the temperature is right, the rod will melt and flow into the gap like water. This is where the magic happens. Let the rod flow and fill the joint completely.
Step 5: Let It Cool Naturally
Don’t try to cool it quickly with water. Let the joint cool down slowly on its own. This helps avoid cracks and ensures the strongest bond.
Tips That Helped Me Get Better Results
- Practice on scrap aluminum first. Your first few tries won’t be perfect, and that’s okay.
- Always keep the rod out of the flame. It should melt from contact with the hot aluminum, not from the torch itself.
- Work in a well-ventilated area. Some of the fumes from flux-coated rods can be irritating.
- Use a small flame. A big flame can heat things too fast and cause warping or melting.
How Strong Is the Bond?
This was one of my biggest concerns too. Would it actually hold? To my surprise, the bond is very strong for most small to medium repairs. It won’t handle heavy structural stress like traditional welding, but for brackets, frames, pipes, and light-duty repairs, it’s more than enough.
Let me break it down with a simple table:
| Type of Repair | Strength Rating | Notes |
|---|---|---|
| Aluminum bracket | Strong | Holds well with correct prep |
| Bike frame dent | Medium | Avoid load-bearing areas |
| Leaky pipe | Strong | Great with the right seal |
| Car radiator fin | Medium | Best for non-pressurized spots |
Can You Use Epoxy Instead?
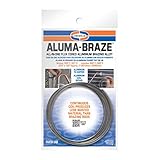
Yes, but it depends on the job. Epoxy like JB Weld (for aluminum) is great for certain repairs—especially where you can’t apply heat.
Epoxy is not permanent under high stress, vibrations, or heat. So if your project needs durability and can withstand a bit of flame, go with the brazing method instead.
How Much Does It Cost to Braze Aluminum at Home?
This is one of the best parts. It’s cheap!
| Item | Approx. Cost |
|---|---|
| Propane torch kit | $20 – $30 |
| Brazing rods (pack) | $10 – $15 |
| Wire brush & sandpaper | $5 – $10 |
| Safety gear | $10 – $20 |
So you’re looking at a total of under $50 if you’re starting from scratch. Way cheaper than buying a welder or paying for a shop to do a small job.
Where to Buy Brazing Rods and Tools?
You can find these at most hardware stores like Home Depot or Lowe’s. I also had good luck ordering online from Amazon.
Just make sure you’re getting low-temperature aluminum brazing rods, sometimes called aluminum repair rods. They usually melt at around 730°F (390°C), which is well below the melting point of aluminum.
Common Mistakes to Avoid
I made a few mistakes when I first tried brazing aluminum, so let me save you the trouble:
- Using a dirty surface: This is the number one reason your bond won’t hold.
- Overheating the metal: If you melt the aluminum, it’s game over.
- Rushing the cooling process: Don’t dunk it in water or blow on it.
- Applying the rod too soon: Wait until the aluminum is hot enough to melt the rod on contact.
Is This Method Safe for Beginners?
Absolutely—if you take the right precautions. Always wear gloves and goggles, work in a ventilated area, and keep a fire extinguisher nearby just in case. If you treat it with the same respect as cooking with a gas flame, you’ll be just fine.
Best Projects for This Technique
Here are a few aluminum-based projects you can tackle at home without a welder:
- Repairing a cracked lawn chair frame
- Fixing a broken aluminum fence panel
- Sealing a leaky irrigation pipe
- Making DIY brackets or holders
- Mending broken tools or garden equipment
When Should You Avoid This Method?
There are a few cases where brazing isn’t the right call:
- Heavy structural repairs (like automotive suspension parts)
- Pressurized systems like fuel lines
- Areas exposed to extreme vibration
- Large industrial applications
In these situations, it’s best to hire a pro or invest in proper welding equipment.
Conclusion
So, can you weld aluminum at home without a welder? Absolutely, yes. I’ve done it, and you can too. With just a propane torch and a few brazing rods, you can fix, build, and restore aluminum parts around your home. It’s cheap, satisfying, and honestly a lot of fun once you get the hang of it.
Just remember to take your time, keep your work clean, and practice on some scraps before diving into the real job. The more you practice, the more confident you’ll get.
Who knew that fixing aluminum could be this simple—without the big price tag of a welder?
FAQs
Can I use a regular soldering iron to weld aluminum?
No, a soldering iron doesn’t get hot enough to melt aluminum brazing rods. You need a propane or butane torch.
Do I need flux to braze aluminum?
Many aluminum rods come with flux built-in, but adding a separate flux can improve the bond. Just make sure it’s safe for aluminum.
Will this method work on thick aluminum?
It’s best for thin to medium thickness (up to ¼ inch). Thicker pieces may require more heat or a different method.
Can I paint over a brazed aluminum joint?
Yes, once it cools and you’ve cleaned off any residue, you can paint over it like any other metal surface.
How long does a brazed aluminum repair last?
With proper cleaning and application, it can last for years. Just avoid using it in high-stress or high-heat areas.