When I first tried to solder galvanized steel wire, I thought it would be just like working with any other metal. As you probably guessed, galvanized steel has its quirks. The zinc coating that protects it from rust also makes it a bit tricky to solder.
I’ve learned the best way to get a strong, clean solder joint on galvanized wire, and today I’m here to share that with you.

Photo by davidneat
If you’re repairing a fence, working on a sculpture, or building a DIY project, this guide will walk you through every step with care.
If you’re sitting beside me, I’d show you each tool, explain each move, and help you get the best results. Since we can’t do that in person, let’s dive into this guide together.
What Is Galvanized Steel Wire?


Before anything else, let’s talk about what we’re dealing with. Galvanized steel wire is just regular steel wire that’s been coated with zinc.
This zinc layer protects the steel from rusting when exposed to moisture or the elements. It’s used in everything from fencing and trellises to hardware cloth and even in art projects.
This zinc layer, while helpful for rust protection, becomes a barrier when you’re trying to solder. The solder won’t stick properly unless you prepare the wire correctly. That’s why the prep process is just as important as the actual soldering.
Why Solder Galvanized Steel Wire?
Most of the time, we use mechanical connections like clamps, twisting, or welding to join wires. So why solder?
Soldering gives a clean, solid electrical connection. It’s useful for low-current wiring, crafting, or creating smooth joints that won’t come loose. In situations where you want both strength and neatness—without the bulk of a clamp—soldering is a great solution.
But getting solder to stick to galvanized steel wire takes a little extra effort, and that’s exactly what I’ll help you with.
Tools and Materials You’ll Need
You don’t need a fancy workshop to do this job, but having the right tools makes it much easier. Here’s what I personally use when soldering galvanized steel wire:
| Tool / Material | Purpose |
|---|---|
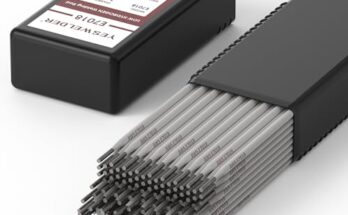
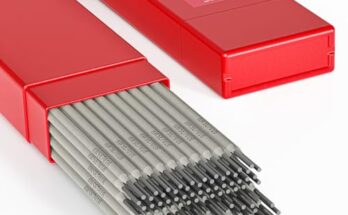
| Galvanized Steel Wire | The wire you want to solder |
| Soldering Iron (60W or more) | Heats and melts the solder |
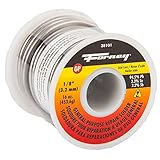
| Solder (Rosin-core or Acid-core) | Creates the bond |
| Flux (zinc chloride or acid flux) | Helps solder stick to the wire |
| Sandpaper or Wire Brush | Removes the zinc coating and cleans surface |
| Rubbing Alcohol or Acetone | Cleans the wire before soldering |
| Heat-resistant Gloves | Protects your hands from burns |
| Safety Glasses | Keeps your eyes safe from splashes |
| Damp Cloth | For cleaning the tip of your soldering iron |
Cleaning and Preparing the Wire
This is the most important step. If you don’t clean and prep your galvanized wire properly, the solder won’t bond. I learned this the hard way.
Here’s how I do it:
- Use sandpaper or a wire brush to remove the zinc coating at the area you’ll be soldering. You don’t have to remove the whole coating—just where you’ll make the joint.
- Once the zinc is brushed off, wipe the wire with rubbing alcohol or acetone. This removes oils and dust.
- Apply flux to the cleaned area. I prefer zinc chloride flux for galvanized steel. It’s a bit aggressive but really gets the job done.
Flux is like a primer. It chemically cleans the surface and helps the solder bond. Without it, the solder will bead up and just fall off.
Choosing the Right Solder
Not all solders work well with galvanized steel. I’ve tried a few, and here’s what I recommend:
- Acid-core solder works great because it has built-in flux. But be cautious—it can be corrosive if not cleaned afterward.
- Rosin-core solder is good for electronics but not strong enough for structural joints unless you use additional flux.
- I usually go with acid-core solder and clean the joint thoroughly afterward.
How to Solder Galvanized Steel Wire Step by Step
Let’s get into the actual process. Don’t rush it, and take your time with each step.
Step 1: Heat the Soldering Iron
Make sure your soldering iron is fully heated. I usually wait 3-5 minutes. A hotter iron (around 700°F) helps melt solder quickly and allows it to flow better onto the wire.
Step 2: Tin the Wire
This is something I always do, especially with steel.
- After applying flux to the wire, touch the solder to the wire, not the iron.
- Hold the soldering iron against the wire until the solder melts and coats the surface.
- This creates a base for the next layer of solder and helps ensure a stronger bond.
Step 3: Join the Wires
Now that each wire is tinned, twist them together or hold them in place with clamps. Then:
- Apply heat with your soldering iron where the wires meet.
- Touch your solder to the joint and let it flow into the twisted area.
- Keep the iron in place just long enough to melt and set the solder.
Once it looks shiny and smooth, remove the heat and let it cool naturally. Don’t blow on it—that can create tiny cracks.
Step 4: Clean the Joint
If you used acid-core solder or zinc chloride flux, you need to clean the joint.
- I use a damp cloth and a bit of rubbing alcohol to wipe down the area.
- For extra protection, apply a bit of clear nail polish or electrical varnish to seal the joint and prevent corrosion.
Common Issues and How to Fix Them
Even when you do everything right, things can go sideways. Let me share a few issues I’ve run into and how I handled them.
Problem: Solder won’t stick
Solution: Check if the wire is clean. Sand it again and use fresh flux.
Problem: Solder beads up and falls off
Solution: You might be working on a part where zinc hasn’t been removed. Strip off more of the coating and try again.
Problem: Weak joints
Solution: Make sure both wires are hot before applying solder. Cold wires lead to weak bonds.
Problem: Fumes and smell
Solution: Always work in a well-ventilated space. Zinc and flux can create fumes that aren’t healthy to breathe in.
Is Soldering Better Than Welding for Galvanized Steel Wire?
In most cases, welding is stronger. But it’s also more complex and expensive. Soldering is perfect for small-scale projects, low-stress joins, or where heat needs to be limited. Plus, soldering requires fewer tools and less skill to start with.
If you’re doing decorative work, repairs, or anything non-structural, soldering is absolutely the way to go. It’s quick, clean, and effective when done right.
Safety Tips You Shouldn’t Ignore
I know we sometimes skip safety, especially for small jobs. But trust me, you don’t want to risk your health over a few wires.
- Always wear gloves and eye protection.
- Work in a well-ventilated space or use a fume extractor.
- Don’t touch the wire until it cools. It stays hot longer than you think.
- Clean your work area and tools after every session.
Zinc fumes can be harmful, especially when soldering or heating galvanized steel. Ventilation is key.
Maintenance After Soldering
Once your joint is complete, you’ll want it to last. I always do a few extra things to make sure my work holds up:
- Check the joint after a few days to see if there’s any corrosion.
- If you’re using the wire outdoors, seal it with rust-resistant paint or a dab of silicone.
- Store your galvanized steel wire in a dry area to prevent future corrosion.
My Go-To Method in a Nutshell
Let me summarize the process for you:
- Clean and sand the area to remove zinc.
- Wipe with alcohol.
- Apply flux.
- Heat the iron and tin the wire.
- Join wires and apply solder.
- Let it cool naturally.
- Clean the joint and protect it if needed.
That’s the full routine I follow, and it works every time.
Final Thoughts
Soldering galvanized steel wire may seem tough at first, but once you understand the process, it becomes second nature.
With a little patience and the right preparation, you’ll get strong, clean joints every time. I’ve used this technique for fixing fences, making crafts, and even some electronics, and it’s never let me down.
Just remember, preparation is key. Don’t skip the cleaning or the flux. And always prioritize safety—those fumes are no joke.
If you’re tackling a project that involves galvanized steel wire, I hope this guide makes it easier and gives you the confidence to dive right in. You’ve got this!
Frequently Asked Questions
What kind of flux is best for soldering galvanized steel wire?
Zinc chloride or acid-based fluxes work best. They break down the zinc oxide layer and help solder bond to the wire.
Can I use a regular soldering iron for galvanized steel?
Yes, but make sure it’s at least 60W or higher. Lower wattage irons may not produce enough heat to melt solder efficiently.
Is it safe to solder galvanized steel indoors?
Only if the area is well ventilated. Zinc fumes can be harmful, so always use fans or fume extractors.
Can I solder galvanized steel wire without removing the zinc?
You can try, but the solder likely won’t stick well. Removing the zinc from the soldering point is highly recommended.
What’s the difference between soldering and welding galvanized steel?
Soldering uses lower heat and is ideal for smaller, low-stress projects. Welding creates a stronger joint but requires more heat and experience.
How do I protect the soldered joint from rust?
Clean off any leftover flux and apply a protective coating like nail polish, clear lacquer, or silicone sealant.
Will acid-core solder corrode the wire over time?
If you don’t clean off the residue, yes. That’s why cleaning the joint after soldering is so important.
Why is my solder joint dull and grainy?
This usually happens when the joint cools too quickly or wasn’t heated evenly. Try reheating and letting it cool slowly.