TIG welding stainless steel is an art and a skill that requires precision, patience, and the right machine settings. When I first started working with stainless steel, I quickly realized that TIG welding is the best process for it.
It provides clean, strong, and corrosion-resistant welds without the mess of spatter or slag. But setting up your TIG welder correctly is the key to success.

Image by thefabricator
If you’re just getting started or want to improve your results, I’m going to walk you through the exact setup process for welding stainless steel. Whether you’re working on thin sheets or thick pipes, getting your TIG welder dialed in properly makes all the difference.
Choosing the Right TIG Welder


Not all TIG welders are created equal, and some machines are better suited for stainless steel than others. For best results, you need a DC (Direct Current) TIG welder. Unlike aluminum, which requires AC (Alternating Current), stainless steel welds best with DCEN (Direct Current Electrode Negative).
Look for a machine that offers precise amperage control, a high-frequency start, and a stable arc. If you plan to do thin stainless steel welding, a welder with pulse control is also a great feature to have.
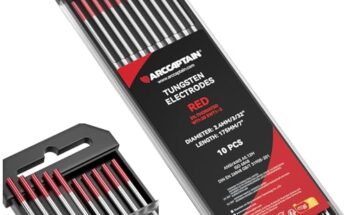
Selecting the Right Tungsten Electrode
Choosing the right tungsten is crucial for clean welds and arc stability. For stainless steel, I always recommend using:
- 2% Thoriated (Red) Tungsten – Best for most stainless steel applications. Provides a stable arc and good heat resistance.
- 2% Lanthanated (Blue) Tungsten – Another great option that offers excellent performance with lower contamination risk.
Make sure to sharpen the tungsten to a fine point before welding. This helps maintain a narrow and focused arc, which is crucial for clean stainless steel welds.
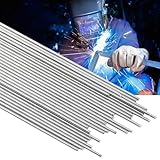
Choosing the Right Filler Rod
The filler metal you choose should match the type of stainless steel you’re welding. Here are some common options:
| Base Metal Type | Recommended Filler Rod |
|---|---|
| 304 Stainless Steel | ER308L |
| 316 Stainless Steel | ER316L |
| 321 Stainless Steel | ER347 |
The “L” in ER308L and ER316L stands for low carbon, which helps reduce carbide precipitation and prevents corrosion.
Setting Up the TIG Welder
Let’s get into setting up your TIG welder step by step.
Polarity and Amperage
Set your machine to DCEN (Direct Current Electrode Negative). This ensures proper heat distribution and prevents excessive tungsten wear.
The amperage setting depends on the thickness of the stainless steel you’re welding. Here’s a general guide:
| Material Thickness | Amperage Range |
|---|---|
| 0.030” – 0.060” (Thin Sheet) | 15-50 Amps |
| 1/16” – 1/8” (Medium Thickness) | 50-120 Amps |
| 1/8” – 1/4” (Thicker Material) | 120-200 Amps |
Use lower amperage for thin materials to prevent warping and burn-through.
Gas Type and Flow Rate
For stainless steel, you should use 100% Argon as the shielding gas. This provides the best arc stability and prevents oxidation. If you’re welding thicker sections, you can use an Argon-Helium mix to increase heat input.
Set your gas flow rate between 15-20 CFH (Cubic Feet per Hour) for normal conditions. If you’re welding outside or in a drafty area, you might need to increase the gas flow slightly to ensure proper shielding.
Torch Setup and Cup Size
Use a gas lens and a #6 to #8 cup for standard applications. A gas lens improves gas coverage, resulting in cleaner welds and less oxidation. For wider welds or higher gas shielding, use a larger cup like a #10 or #12.
Make sure your torch is fitted with a proper collet and collet body to hold the tungsten securely.
Using Pulse Settings (Optional)
If your TIG welder has pulse settings, they can be useful when welding thin stainless steel. Here’s how it helps:
- Lower heat input – Prevents burn-through and warping.
- Better arc control – Helps maintain a consistent bead.
- Less discoloration – Reduces heat-affected zones.
A good starting point for pulse settings:
- Pulse Frequency: 1-2 Hz
- Peak Amperage: 70-80% of normal setting
- Background Amperage: 20-30% of peak
Preparing Stainless Steel for Welding
Proper preparation is just as important as welder settings. If the material isn’t clean, the weld will be contaminated and weak.
Cleaning the Metal
- Use a stainless steel wire brush – This removes oxidation without embedding contaminants.
- Wipe down with acetone – This removes grease, oil, and dirt before welding.
- Avoid cross-contamination – Never use tools that have touched carbon steel.
Clamping and Fixturing
Stainless steel warps easily, so it’s a good idea to use clamps and heat sinks to hold everything in place. If possible, tack weld your workpiece before running full welds.
Welding Techniques for Stainless Steel
Once your TIG welder is set up and your material is prepped, it’s time to start welding. Here are some important techniques to follow:
Torch Angle and Arc Length
- Keep the torch at a 10-15 degree angle to the workpiece.
- Maintain a tight arc length – about 1/8 inch or less. A long arc will introduce oxygen and contamination into the weld.
Using the Right Travel Speed
- Move slowly enough to get full penetration but fast enough to avoid overheating.
- Watch for discoloration – If the metal turns dark blue or gray, you’re using too much heat.
Adding Filler Metal
- Dip the filler rod into the leading edge of the weld puddle.
- Avoid touching the tungsten with the filler rod, or you’ll contaminate the weld.
- Keep a consistent rhythm to ensure even bead formation.
Preventing Discoloration and Heat Distortion
Stainless steel is sensitive to heat input, so controlling temperature is essential.
- Use back purging with argon for pipe welding to protect the inside of the weld.
- Limit heat buildup by using intermittent welding instead of continuous welding.
- Quench thicker pieces with damp cloths or copper backing to absorb excess heat.
Post-Weld Cleaning
After welding, stainless steel needs to be cleaned to maintain its corrosion resistance.
- Remove oxidation and heat tint using a stainless steel wire brush or pickle paste.
- Wipe the weld with acetone to remove residue.
- If necessary, use a polishing wheel to restore the original finish.
Conclusion
Setting up a TIG welder for stainless steel isn’t complicated, but it does require attention to detail. The right welder settings, tungsten, shielding gas, and techniques all play a role in achieving strong, clean, and professional-looking welds.
If you take the time to set up your machine properly, clean your material, and control heat input, you’ll get beautiful stainless steel welds every time. The more you practice, the better your results will be.
FAQs
What gas should I use for TIG welding stainless steel?
100% Argon is the best choice. For thicker materials, an Argon-Helium mix can help.
Why does my stainless steel weld turn blue?
Blue discoloration means too much heat. Reduce your amperage or increase travel speed.
What tungsten is best for TIG welding stainless steel?
2% Thoriated (Red) or 2% Lanthanated (Blue) tungsten works best.
Can I TIG weld stainless steel without filler metal?
Yes, this is called autogenous welding, but it’s only suitable for very thin materials.
How do I prevent warping in stainless steel?
Use heat sinks, tack weld first, and control heat input with pulse settings.