Replacing copper pipes with PEX is one of the best upgrades you can make to your plumbing system. If you’re dealing with aging copper pipes, leaks, or just looking for a more cost-effective and flexible solution, PEX piping is a game-changer.
I’ve personally tackled this project and can say with confidence that it’s more straightforward than you might think. With the right tools, a little patience, and some basic plumbing knowledge, you can swap out those old copper pipes for PEX and enjoy a hassle-free plumbing system.
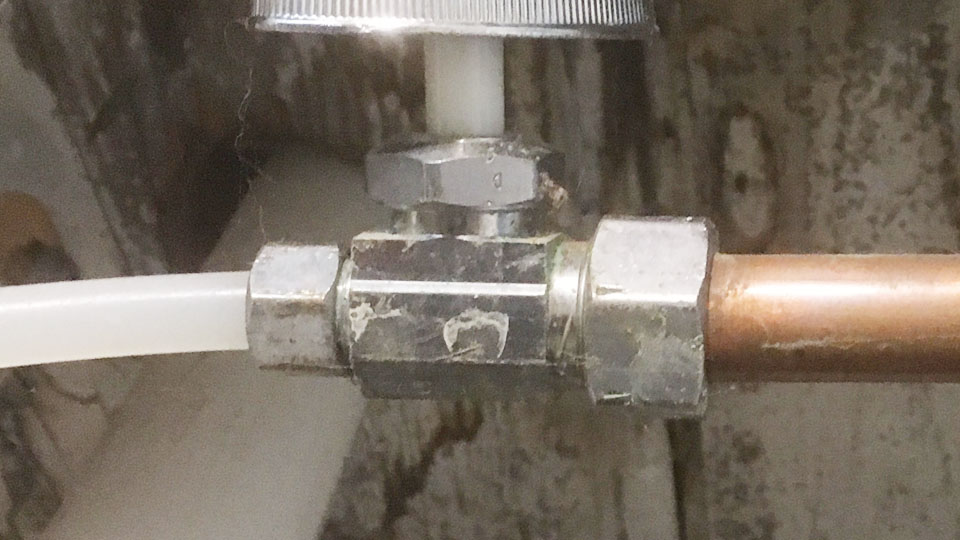
Image by stackexchange
If you’re new to plumbing projects, don’t worry—I’ll walk you through everything you need to know, from understanding the advantages of PEX to a step-by-step guide on replacing your copper pipes. Let’s get started on making your plumbing system more efficient and reliable.
Why Replace Copper Pipes With PEX?


![[10-Pack] PROCURU 1/2' PEX-A x 1/2' Female Sweat Adapter, Expansion PEX-A F1960 Brass Plumbing Fitting, LF Certified Safe (Fits over 1/2' Copper Pipe)](https://m.media-amazon.com/images/I/41Og7YYwJaL._SL160_.jpg)

Before we dive into the process, let’s talk about why PEX is such a popular choice.
Cost Savings
Copper prices have skyrocketed in recent years, while PEX remains an affordable alternative. Not only is the material cheaper, but it also reduces labor costs because it’s much easier to install.
Flexibility
Unlike rigid copper pipes, PEX tubing is flexible and can be easily routed around obstacles. This means fewer fittings and joints, which reduces the chances of leaks.
Corrosion Resistance
Copper pipes are prone to corrosion over time, especially if your water has high acidity. PEX is resistant to rust and scale buildup, making it a long-lasting solution.
Freeze Resistance
PEX expands when it freezes, reducing the risk of burst pipes in cold weather, a common issue with copper piping.
DIY Friendly
You don’t need a torch, solder, or complicated tools to install PEX. Many homeowners find it much easier to work with than copper.
Tools and Materials Needed
Before you start, gather all the tools and materials you’ll need to make the process smooth.
Tools
- Pipe cutter (for copper pipes)
- PEX tubing cutter
- Adjustable wrench
- PEX crimping or cinch tool
- Deburring tool (for cleaning cut copper pipes)
- Measuring tape
- Marker
Materials
- PEX tubing (red for hot water, blue for cold water, white for either)
- Push-to-connect, crimp, or expansion fittings
- PEX crimp rings or cinch clamps
- PEX manifold (if needed)
- Shut-off valves
- Teflon tape
- Pipe insulation (if needed)
Choosing the Right PEX Connection Method
PEX can be connected in a few different ways, so it’s important to choose the right method for your setup.
- Push-to-Connect (SharkBite) – Easiest to use, no tools required, but more expensive.
- Crimp Connections – Uses copper crimp rings and a crimping tool; affordable and reliable.
- Cinch (Clamp) Connections – Uses stainless steel clamps and a cinch tool; easier for tight spaces.
- Expansion Fittings – Requires an expansion tool; commonly used with PEX-A tubing.
Step-by-Step Guide to Replacing Copper Pipes With PEX
Step 1: Turn Off the Water Supply
Before making any changes, shut off the main water supply to avoid a mess. Open the lowest faucet in your home to drain any remaining water from the pipes.
Step 2: Cut and Remove the Old Copper Pipe
Use a pipe cutter to cut the section of copper pipe you’re replacing. If you’re keeping some copper and transitioning to PEX, leave at least ½ inch of copper pipe for push-to-connect fittings. Deburr the cut ends with a deburring tool to remove sharp edges.
Step 3: Plan Your PEX Routing
Since PEX is flexible, you don’t need as many joints or fittings as you would with copper. Plan the best route for your new pipes, keeping them away from sharp edges and high-heat areas.
Step 4: Install PEX Fittings and Connections
- If you’re using push-to-connect fittings, simply push the PEX tubing onto the fitting until it locks in place.
- If you’re using crimp rings, slide the ring onto the PEX, insert the fitting, and use a crimping tool to secure it.
- If you’re using cinch clamps, slide the clamp over the tubing, insert the fitting, and use the cinch tool to tighten it.
Step 5: Run the PEX Tubing
Secure the PEX tubing along its route using pipe supports or hangers every 32 inches. Make sure to leave a little slack to allow for expansion and contraction.
Step 6: Connect PEX to Copper (If Needed)
If you’re transitioning from copper to PEX, use a push-to-connect coupling or a threaded adapter with Teflon tape to ensure a leak-free seal.
Step 7: Turn On the Water and Check for Leaks
Once all connections are made, slowly turn on the main water supply. Inspect each fitting for leaks and tighten any loose connections if necessary.
Step 8: Insulate PEX Pipes (Optional)
If your PEX runs through unheated areas, such as a basement or crawl space, wrap it with pipe insulation to prevent heat loss and freezing.
Common Mistakes to Avoid
- Not deburring copper pipe ends – Sharp edges can damage PEX fittings and lead to leaks.
- Using the wrong type of PEX – PEX-A is more flexible, while PEX-B is slightly stiffer but more affordable. Choose the right one for your project.
- Over-tightening connections – Hand-tighten push-to-connect fittings and follow the correct tool pressure for crimp and cinch fittings.
- Not allowing for expansion – PEX expands and contracts, so leave a little slack in long runs.
Benefits of Using PEX in Your Plumbing System
Switching to PEX isn’t just about replacing old pipes—it’s about upgrading your plumbing system for efficiency and longevity. PEX resists freezing, eliminates corrosion concerns, and makes future plumbing repairs much easier.
FAQs
Can I connect PEX directly to a water heater?
Yes, but it requires a short copper or stainless steel connector before transitioning to PEX, as direct PEX-to-water heater connections are not recommended.
How long does PEX piping last?
PEX has a lifespan of 40–50 years, making it a durable choice for home plumbing.
Is PEX safe for drinking water?
Yes, PEX is approved for potable water use and does not leach harmful chemicals.
Can PEX be used outdoors?
PEX should not be exposed to direct sunlight for extended periods, as UV rays can degrade it over time. If used outdoors, it must be properly covered or insulated.
Does PEX reduce water pressure?
PEX may slightly reduce water pressure due to its smaller internal diameter, but proper installation with minimal fittings will maintain strong flow.
Conclusion
Replacing copper pipes with PEX is a smart move for any homeowner looking to upgrade their plumbing system. It’s flexible, affordable, and much easier to install than traditional copper piping. If you’re comfortable with DIY projects, you can handle this with the right tools and some careful planning.
Not only will you save money on installation, but you’ll also have a reliable plumbing system that requires less maintenance over time. If you’re tackling a small section or a whole-house repipe, PEX makes the process smoother and more efficient.