When I first started MIG welding, one of the biggest frustrations was dealing with spatter. It seemed like no matter what I did, tiny molten metal droplets would go flying everywhere, leaving a messy weld, extra cleanup, and even damaging nearby surfaces. If you’ve ever faced the same issue, I completely understand how annoying it can be.
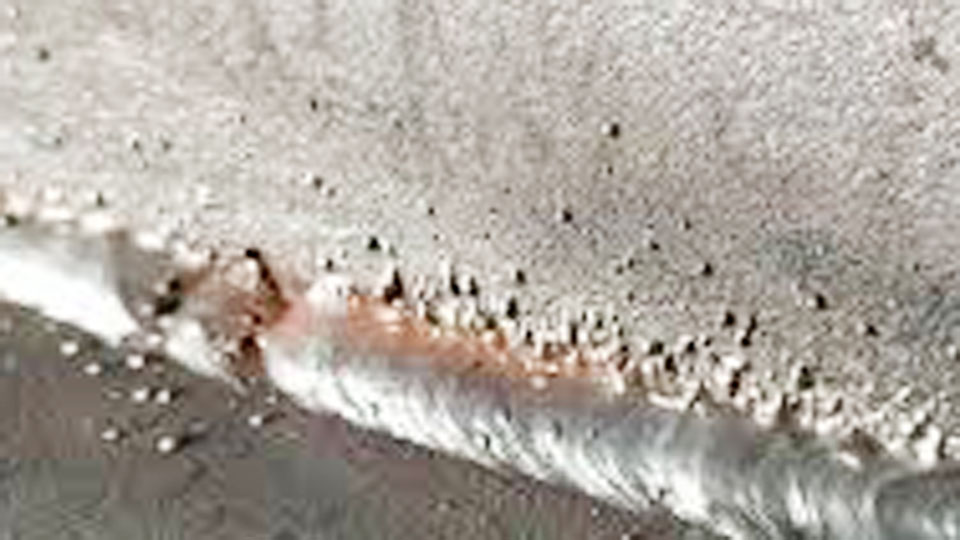
Image by boyiprototyping
MIG welding doesn’t have to be messy. With the right settings, techniques, and a little preparation, you can significantly reduce spatter and achieve cleaner, smoother welds. I’ve learned some effective ways to control spatter, and I’m excited to share them with you.
If you’re a beginner or have been welding for a while, these practical tips will help you minimize spatter and make your welding projects look more professional.
What Causes Spatter in MIG Welding?


Spatter happens when molten metal droplets are expelled from the weld pool, and they stick to the surrounding area. Several things can cause this, including:
- Incorrect voltage and wire speed settings
- Dirty metal surfaces
- Poor shielding gas flow
- Improper welding technique
Understanding the root cause of spatter is the first step in fixing the problem. Let’s go over each of these issues in detail and find out how to reduce or eliminate spatter in MIG welding.
Use the Correct Voltage and Wire Speed
One of the biggest reasons for spatter in MIG welding is incorrect voltage and wire speed settings. If either one is off, the weld won’t be stable, and molten metal can splatter all over the place.
Here’s how settings affect spatter:
- Too high voltage – Creates an unstable arc and excessive heat, leading to more spatter.
- Too low voltage – Causes a short arc, resulting in a popping sound and excess spatter.
- Too fast wire speed – Pushes too much wire into the weld pool, leading to erratic arc behavior.
- Too slow wire speed – Creates an unstable arc that causes spatter.
The key is to adjust your voltage and wire speed so that you get a stable arc with minimal popping or sputtering. Every machine is different, so I recommend starting with the manufacturer’s settings and fine-tuning from there.
Clean Your Metal Before Welding
Dirty metal is a major cause of spatter. Rust, oil, paint, or dirt on the surface of the metal contaminates the weld and disrupts the arc, leading to excess spatter.
Here’s what I do before welding:
- Use a wire brush or grinder to remove rust and mill scale.
- Wipe down the metal with acetone or a degreaser to get rid of oil and grease.
- Ensure there’s no moisture on the surface, as even a little water can create spatter.
Clean metal makes a huge difference in weld quality and spatter reduction. It only takes a few minutes to prepare, but it saves a lot of time on cleanup later.
Optimize Your Shielding Gas
The shielding gas you use can greatly impact spatter levels. If gas flow is too low, too high, or mixed incorrectly, it can cause arc instability and lead to excessive spatter.
Here’s how to ensure proper gas coverage:
- Use the right gas mixture – A 75% argon / 25% CO2 mix is ideal for reducing spatter. Pure CO2 creates deeper penetration but also increases spatter.
- Adjust the gas flow rate – The recommended range is 20-25 CFH (cubic feet per hour). Too much gas can cause turbulence, while too little gas won’t protect the weld.
- Check for leaks – Make sure your hoses and connections are sealed properly to maintain consistent gas flow.
Good shielding gas coverage helps stabilize the arc and significantly reduces spatter.
Use the Right Contact Tip and Nozzle
The contact tip and nozzle play a big role in controlling spatter. If they are dirty, damaged, or not properly sized, they can cause arc instability and spatter.
Here’s what I always check:
- Make sure the contact tip is the correct size for your wire diameter. A loose tip can cause erratic wire feeding.
- Keep the nozzle clean – Spatter buildup inside the nozzle can affect gas flow and arc stability. I clean mine with a wire brush or anti-spatter spray.
- Replace worn-out tips – If the contact tip hole becomes enlarged, it’s time to replace it.
A well-maintained welding gun ensures a steady arc and cleaner welds.
Adjust Your Welding Technique
Even with perfect settings and clean metal, poor welding technique can still create spatter. Here are some things to focus on:
- Maintain the right gun angle – Keep a 10-15° push angle for smoother arc stability.
- Use the correct travel speed – Too fast can cause an uneven arc, and too slow can create excess buildup.
- Avoid excessive stick-out – The ideal wire stick-out is ⅜” to ½”. If it’s too long, it causes arc instability.
With practice and small adjustments, you’ll find the right balance for clean, low-spatter welds.
Use Anti-Spatter Spray and Gel
Even with perfect settings, some spatter is inevitable. That’s where anti-spatter spray and gel come in handy.
- Anti-spatter spray – Applied to the workpiece and nozzle to prevent spatter from sticking.
- Nozzle gel – Helps keep the nozzle clean and prevents spatter buildup inside.
I always use a light coat of anti-spatter spray on my workpiece before welding—it saves time on post-weld cleanup.
Choose the Right Wire Type
Not all MIG wires are the same. Some produce more spatter than others, so choosing the right one makes a difference.
Here’s what I recommend:
- ER70S-6 – The best wire for reducing spatter when welding mild steel.
- Use high-quality wire – Cheap wire can have an inconsistent feed, leading to arc instability and spatter.
Sticking with good-quality wire ensures a smooth feed and a stable arc with less spatter.
Troubleshooting Common Spatter Issues
If you’re still having trouble with spatter, here’s a quick guide to help diagnose and fix the issue:
| Problem | Possible Cause | Solution |
|---|---|---|
| Excessive spatter | Too much wire speed or voltage too low | Adjust wire speed and increase voltage slightly |
| Arc instability | Poor gas coverage or bad contact tip | Check gas flow, replace contact tip |
| Spatter sticking to nozzle | Nozzle clogged with buildup | Use anti-spatter spray or nozzle gel |
| Inconsistent wire feed | Dirty drive rolls or incorrect tension | Clean drive rolls and adjust tension |
By identifying the issue early, you can make small adjustments and prevent excessive spatter before it becomes a major problem.
Conclusion
MIG welding doesn’t have to be messy. If you take the time to set your welder correctly, clean your metal, and use the right techniques, you can significantly reduce spatter and achieve cleaner, stronger welds.
By focusing on proper voltage, wire speed, shielding gas, and gun angle, you can control spatter and make your welding process smoother and more efficient. And if some spatter still shows up, a little anti-spatter spray and cleanup will take care of it.
The key is practice and patience. The more you weld, the better you’ll get at fine-tuning your settings and controlling spatter. Soon enough, you’ll be laying down clean, smooth welds with minimal mess!
FAQs
Why is my MIG welder producing so much spatter?
Spatter can be caused by incorrect voltage, wire speed, dirty metal, or poor shielding gas coverage.
Does shielding gas affect spatter levels?
Yes, using a 75% argon / 25% CO2 mix reduces spatter compared to pure CO2.
How can I remove spatter from my workpiece?
Use a chipping hammer or wire brush to clean off hardened spatter, or apply anti-spatter spray before welding.
Should I use anti-spatter spray?
Yes, it helps prevent spatter from sticking and makes post-weld cleanup easier.
How does wire quality affect spatter?
Low-quality wire can cause inconsistent feeding and arc instability, leading to more spatter. Always use high-quality MIG wire.