If you’ve ever tried to weld cast iron, you already know it’s not like welding mild steel or aluminum. Cast iron has a personality of its own. It’s strong, rigid, and tough—but it can be surprisingly fragile under heat.
I’ve had my fair share of cracked welds and frustrating repairs when working with it. With practice and patience, I figured out how to stick weld cast iron the right way.

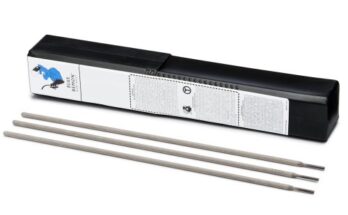
Image by BrandonLund
Stick welding—also known as shielded metal arc welding (SMAW)—is one of the most common methods used when repairing or fabricating with cast iron.
It’s accessible, portable, and powerful. But it also demands careful technique and preparation. That’s what I’ll walk you through today.
Whether you’re fixing a broken engine part, restoring an old tool, or welding cast iron brackets to structural components, stick welding can get the job done—if you follow the right steps. I’ll share what’s worked for me and what to avoid, so you don’t have to learn the hard way.
What Makes Cast Iron Tricky to Weld?
Before we start melting metal, let’s understand what we’re working with. Cast iron is a material with high carbon content—usually between 2% to 4%. That makes it strong and durable, but also brittle and prone to cracking when exposed to sudden heat changes or stress.
When you weld cast iron, the high heat causes the carbon to migrate, which can lead to hardness, brittleness, and cracking if not properly managed. Unlike steel, which bends and absorbs stress, cast iron tends to snap. That’s why you have to be very strategic with heat input, electrode choice, and cooling.
It took me a few cracked pieces and a couple of ruined parts to fully respect how different cast iron is from welding anything else.
When Should You Stick Weld Cast Iron?
Stick welding is a great option for cast iron in many repair and maintenance jobs. I often use it when I’m out in the field or working on larger, immovable parts. It’s also great when other welding processes like TIG or MIG aren’t practical.
Here are some real-life situations where stick welding cast iron makes sense:
- Repairing cast iron engine blocks or cylinder heads
- Fixing broken castings or machinery frames
- Sealing cracks in cast iron cookware or stoves
- Reinforcing cast iron with steel plates or tabs
- Restoring antique tools or parts with historical value
If you’re dealing with a thick, rugged piece of cast iron and don’t have access to a welding shop setup, stick welding is often your best bet.
Tools and Equipment You’ll Need
Getting set up with the right tools is half the battle. Stick welding cast iron doesn’t require fancy gear, but you do need specific materials and safety items. Here’s a simple table to help you get prepared:
| Item | Purpose |
|---|---|
| Stick welder (AC or DC) | Core machine for arc welding |
| Nickel electrodes (ENiFe-CI or ENi-CI) | Best suited for cast iron welding |
| Preheating torch or oven | To reduce thermal shock |
| Angle grinder or wire brush | Cleaning the metal surface |
| Welding clamps or jig | Holding pieces in place |
| Welding gloves, helmet, and jacket | Personal safety gear |
| Cooling blanket or dry sand | Slow post-weld cooling |
Having everything ready before you strike an arc will make the job smoother and safer.
Choosing the Right Electrode for Cast Iron
This is one area where it really pays to know your stuff. The electrode you choose can make or break the weld—literally.
There are three main types of stick welding rods that work well on cast iron:
| Electrode Type | Description | Best Use |
|---|---|---|
| ENiFe-CI (Nickel 55) | Iron-nickel blend, slightly harder | Great for thick or structural repairs |
| ENi-CI (Nickel 99) | Mostly nickel, soft and machinable | Ideal for delicate or precise work |
| ESt (Steel-based) | Inexpensive, not machinable | Only for non-critical repairs |
I like ENi-CI rods when I know I’ll need to machine the weld later. But for more rugged jobs, ENiFe-CI provides a bit more strength and bonding power.
Make sure your welder settings match the electrode type. Most nickel rods prefer DC current and work better in flat or horizontal positions.
Preparing the Cast Iron for Welding
Preparation is everything when welding cast iron. Skip this part and you’ll likely end up with a cracked weld or a repair that doesn’t hold.
Here’s my go-to prep checklist:
- Clean the metal thoroughly. Cast iron is porous and often soaked with oil, grease, or rust. Use a grinder or wire wheel to clean the surface completely. I sometimes even bake the part in a low oven to draw out embedded oil.
- Bevel the edges. If you’re repairing a crack or welding two parts together, grind a V-groove into the joint. This improves penetration and creates room for the weld metal.
- Drill relief holes. When welding the end of a crack, I often drill a small hole at both ends of the crack. This helps stop it from spreading as the metal heats up.
A clean surface and good fit-up are essential. You don’t want oil bubbling up through the weld or gaps that cause stress concentrations.
Importance of Preheating
Here’s where a lot of people go wrong—skipping the preheat. Cast iron hates rapid temperature changes. Preheating evens out the expansion of the metal, reduces stress, and helps prevent cracking during welding and cooling.
I usually aim for a preheat temperature between 400°F to 700°F, depending on the part size. You can use a propane torch, induction heater, or a simple oven if the part fits.
Here’s a general guide:
| Cast Iron Thickness | Suggested Preheat Temp |
|---|---|
| Up to ½ inch | 350–400°F |
| ½ to 1 inch | 400–600°F |
| Over 1 inch | 600–700°F |
Always heat the entire part evenly. If you only heat one area, you’ll create uneven expansion and risk cracking.
Welding Techniques for Stick Welding Cast Iron
This is where the magic happens—or the problems. Stick welding cast iron is more about technique than speed. Take it slow, stay in control, and follow these principles:
- Use short welds (stitch welding). I like to weld in 1 to 2-inch segments, letting the part cool slightly between each one. This reduces heat buildup and stress.
- Peen the weld. After each weld pass, lightly tap the weld with a chipping hammer. This helps relieve internal stress and minimize cracking.
- Keep amperage moderate. Don’t crank the heat too high. Nickel rods don’t need a ton of amperage to get good penetration.
- Maintain a steady arc. Keep the rod at a consistent angle (around 10–15 degrees), and move slowly. Avoid weaving too much—this isn’t like MIG welding.
Stick welding cast iron is more about patience than perfection. I often take breaks between passes to let the part cool naturally before continuing.
Post-Weld Cooling and Treatment
Once you’ve finished welding, your job isn’t over. In fact, how you cool the part is just as important as how you welded it.
- Cool slowly. Wrap the part in an insulating blanket, or bury it in dry sand or ashes. Let it cool over several hours—or even overnight.
- Inspect the weld. Look for signs of cracking, porosity, or poor fusion. If needed, grind down high spots and re-weld with short passes.
- Avoid water or forced air. Never cool cast iron with water or a fan. It will almost certainly crack.
The best repairs I’ve done on cast iron were the ones I let cool slowly and carefully. It’s worth the extra time.
What If the Weld Cracks?
Even when you do everything right, sometimes a weld can crack. When that happens, don’t panic. It doesn’t always mean you failed—just that the metal didn’t cool evenly or handled stress poorly.
Here’s what I do if I spot a crack:
- Grind out the crack completely.
- Re-preheat the part.
- Re-weld using short, controlled passes.
- Use a different electrode if the previous one didn’t bond well.
In some cases, I’ve added a small steel reinforcement plate to help spread out stress, especially on load-bearing parts.
Stick Welding Cast Iron vs Other Methods
You might wonder, “Why not just MIG or TIG this instead?” Good question.
Here’s how stick welding compares:
| Welding Method | Pros | Cons |
|---|---|---|
| Stick Welding | Portable, strong welds, low cost | Requires skill, can be messy |
| MIG Welding | Fast, clean, great on steel | Not ideal for brittle cast iron |
| TIG Welding | Precise, clean, great for small parts | Slow, needs steady hand and good setup |
Stick welding shines when you’re doing outdoor or large part repairs. It’s also less sensitive to dirty or rusty metal, which is common with old cast iron.
Conclusion
Learning how to stick weld cast iron isn’t just about laying down beads—it’s about respecting the material. Cast iron doesn’t behave like steel. It doesn’t forgive shortcuts. When you follow the right steps—prep, preheat, the right rods, slow welds, and gradual cooling—you’ll start to get consistent, solid results.
I’ve come to appreciate the challenge of working with cast iron. It teaches you to slow down, pay attention, and trust your technique. And when the weld holds and the repair is strong, there’s nothing more satisfying.
If this is your first time welding cast iron, don’t be discouraged if it doesn’t go perfectly. Practice, learn from your mistakes, and you’ll get better every time. Stick welding cast iron is a skill worth mastering—and now you’ve got the knowledge to do it right.
FAQs
What is the best stick welding rod for cast iron?
Nickel 99 (ENi-CI) is best for machinability, while Nickel 55 (ENiFe-CI) is stronger and better for structural repairs.
Do I need to preheat cast iron before stick welding?
Yes, preheating helps prevent cracking by reducing thermal stress.
Can you weld cast iron with 7018 rods?
7018 rods can be used in some cases, but they are not ideal. Nickel rods are much better suited for cast iron.
Why does cast iron crack after welding?
Cracking usually happens due to rapid cooling or uneven heat distribution. That’s why preheating and slow cooling are so important.
Is it possible to repair cast iron without welding?
Yes, methods like brazing or using metal-filled epoxies exist, but welding is the strongest and most permanent option.


