If you’ve ever worked with square tubing, you know that welding the corners is where the real challenge begins. I’ve been through this exact situation many times, especially when building frames or custom projects that demand precise angles and strong joints.
I still remember the first time I tried to weld square tubing corners—it looked like a melted mess, and I had to grind most of it off and start over. I learned how to do it properly, and now I want to share everything I’ve learned so you don’t have to make the same mistakes I did.
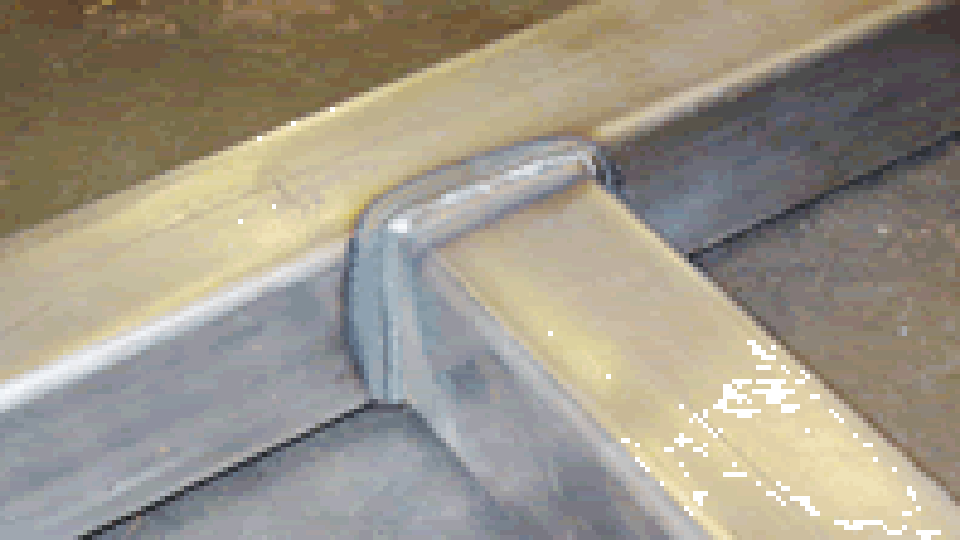
Image by westermans
Welding square tubing corners isn’t just about sticking two pieces together. It’s about understanding how metals behave, how heat flows, and how the angles come together to create a structure that’s not only durable but also looks great.
If you’re working on a table frame, a gate, a trailer, or a DIY furniture piece, getting those corners right is essential. Let’s walk through it together—step by step—like I would if you were standing right next to me in my garage shop.
What Makes Welding Square Tubing Corners Unique?


Square tubing is different from round or flat stock. The geometry adds a layer of complexity because each piece needs to align perfectly on multiple sides.
You’re not just dealing with one joint—you’re working with corners that meet at 90 degrees (sometimes even mitered cuts), and all the seams need to fuse properly.
Unlike pipe welding where you’re dealing with curves, square tubing requires a good eye for straight lines and tight fits. A poor corner weld on square tubing can easily lead to weak spots or crooked structures, especially under load.
Choosing the Right Type of Square Tubing
Before you even pick up the torch, start with the right material. Not all square tubing is created equal. Depending on your project, you might need light or heavy gauge tubing, and that affects how you weld it.
| Material Type | Common Uses | Wall Thickness |
|---|---|---|
| Mild Steel | Furniture, frames, light-duty | 0.065″ – 0.120″ |
| Stainless Steel | Outdoor or food applications | 0.065″ – 0.120″ |
| Aluminum Square Tubing | Lightweight structures | 0.063″ – 0.125″ |
| Galvanized Steel Tubing | Corrosion resistance projects | 0.065″ – 0.100″ |
If you’re welding mild steel tubing, you’re in luck—it’s the most forgiving. Stainless and aluminum square tubing require more care and cleaner technique, and galvanized should be handled with caution due to the toxic fumes.
Tools and Equipment You’ll Need
Here’s what I personally use every time I weld square tubing corners:
- Welding machine (MIG, TIG, or Stick—more on that below)
- Angle grinder with flap disc and cutting wheel
- Speed square or framing jig
- Clamps (C-clamps or corner clamps)
- Welding table or flat fireproof surface
- Measuring tape and scribe
- Safety gear (gloves, helmet, jacket, and respirator if needed)
Good setup is half the job. If your tubing isn’t held square and tight during welding, even perfect technique won’t save the finished product.
Deciding Between MIG, TIG, and Stick Welding
I often get asked which welding method is best for square tubing corners. Each has its own strengths depending on the material and project.
MIG Welding is probably the easiest and fastest method, especially for beginners or for tacking corners. It gives a clean weld and works well on thinner tubing.
TIG Welding gives you the most control and cleanest appearance. It’s perfect for stainless and aluminum square tubing but takes longer and requires a steady hand.
Stick Welding is more old-school and works well outdoors or on heavy-duty steel. It’s not the best for thin-walled tubing because it can burn through more easily.
If you’re new, start with MIG. If you’re doing food-grade stainless work, go with TIG. And if you’re welding outside in the wind, stick is a solid choice.
Prepping the Tubing for Welding
One of the most critical steps—often overlooked—is preparing the metal. Dirty, oily, or galvanized square tubing won’t weld cleanly. Here’s what I always do:
- Degrease the metal – Use acetone or rubbing alcohol to remove oil and grime.
- Remove mill scale or galvanization – Use a flap disc to expose clean, shiny metal.
- Deburr the edges – A smooth edge helps the weld flow evenly.
- Cut accurately – Use a chop saw or angle grinder to make square cuts.
If your corners are going to be mitered at 45 degrees, measure twice and cut once. Poor fit-up causes gaps, weak welds, and crooked joints.
Clamping and Squaring the Tubes
Nothing messes up a square tubing project faster than out-of-square corners. When I started, I didn’t always clamp things right. My table frames would wobble no matter how good the welds looked.
Now, I always use:
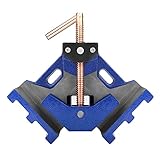
- Corner clamps or magnetic squares to hold the tubing in position.
- A speed square to double-check angles.
- Shims for tight fit-up when needed.
Hold everything snug and test for square before you tack. Always tack both sides of the joint before doing a full weld. This helps prevent distortion from heat.
Tacking the Corners
Tack welds are small welds that temporarily hold your workpiece in place. Here’s my process:
- Tack both inside and outside corners.
- Let the metal cool for a few seconds before flipping or moving.
- If it’s a long piece, tack the center too to avoid warping.
Tacking also lets you check your angles again before committing. If it’s out of square now, it’ll be worse after welding.
Performing the Final Welds
Now the fun begins. Once the piece is clamped and tacked, it’s time to make the full welds. A few tips I live by:
- Start on one corner and work your way around.
- Weld in short sections (about 1–2 inches), then move to the opposite side.
- This helps balance the heat and reduce warping.
For square tubing, I usually run a fillet weld on the inside corner and a flat weld on the outside. If the tubing is thick enough, you can bevel the edges for a stronger joint.
Dealing with Warping
Square tubing is notorious for pulling out of alignment once heat is introduced. Even experienced welders deal with this, especially on longer frames. Here’s what helps:
- Use backstep welding: Weld small sections in reverse direction.
- Allow cooling time between welds.
- Clamp everything tight and leave clamps in place while cooling.
- Alternate sides to distribute heat evenly.
If your corners warp slightly, you can sometimes correct it with a clamp or gentle persuasion using a mallet.
Grinding and Finishing the Welds
Unless you’re going for the raw welded look, you’ll want to grind the corners for a smoother finish. I use a flap disc on my angle grinder and go over each weld slowly.
Make sure not to grind too much—especially on thinner tubing—because it weakens the joint. If you plan to paint the tubing, a smooth finish helps the paint adhere better.
Welding Different Corner Configurations
There’s more than one way square tubing can meet at a corner. Here’s a table that outlines the most common corner joints and how I approach each:
| Corner Type | Description | Tips for Welding |
|---|---|---|
| Butt Joint (L-Shaped) | Two tubes meet at a 90° angle | Use internal gusset for extra strength |
| Mitered Joint | Tubes cut at 45° for a clean outer corner | Use clamps and tack both sides before welding |
| T-Joint | One tube meets the middle of another | Weld all three exposed seams |
| Box Frame (Closed Corners) | All sides are enclosed in a box-shaped layout | Weld in stages to prevent heat buildup |
Each of these requires different strategies, but with good fit-up and clean technique, they all turn out solid.
Safety Reminders When Welding Square Tubing
I always like to throw in a quick word about safety. Welding square tubing often means working with angled clamps, heavy materials, and sharp edges. Here are a few things I never skip:
- Wear a welding helmet with the right shade.
- Use cut-resistant gloves and a welding jacket.
- Ventilate your workspace, especially if grinding or working on galvanized steel.
- Keep a fire extinguisher nearby. Sparks can travel.
It’s easy to get caught up in the project, but safety keeps you welding longer.
Common Mistakes and How to Avoid Them
Let me just list a few things I learned the hard way:
- Rushing the fit-up – Always check for square twice.
- Skipping prep work – Dirty metal equals bad welds.
- Over-welding – Too much heat warps the tubing.
- Ignoring tacks – Weak or missing tacks shift during welding.
Fixing these is simple but makes a world of difference.
Conclusion
Welding square tubing corners might seem intimidating at first, but once you understand the steps—prep, clamping, tacking, and controlled welding—it becomes a skill you’ll be proud to have.
I’ve messed up more corners than I can count, but every time I practiced, I got better. Now, I can confidently build frames, furniture, gates, and more—and I want you to feel just as confident.
Take your time, set things up properly, and don’t rush the welds. It’s okay if the first few aren’t perfect. That’s how you learn. If we were sitting together in the shop, I’d tell you the same thing—just breathe, focus on one weld at a time, and enjoy the process.
Frequently Asked Questions
Can I use MIG welding for square tubing corners?
Yes, MIG welding works great for square tubing. It’s fast, easy to learn, and produces clean welds on mild steel.
How do I keep my tubing from warping?
Use clamps, weld in short sections, and alternate sides to distribute heat evenly. Let the tubing cool between welds.
Do I need to bevel the edges before welding?
If the tubing is thick, yes. Beveling helps the weld penetrate better. For thin tubing, it’s not always necessary.
Can I weld square tubing without a welding table?
Yes, but it’s harder to keep things square. A flat fireproof surface and good clamps will help.
Is it okay to grind down the welds?
Yes, as long as you don’t grind too much and weaken the joint. Use a flap disc for smooth results.