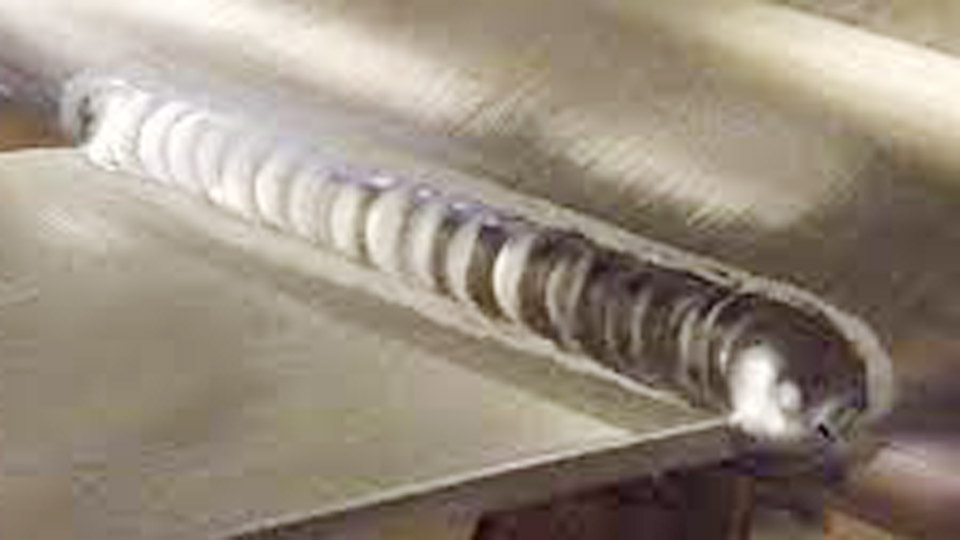
When someone asks me how to weld aluminum to aluminum, I smile because I remember the first time I tried it. It looked easy at first glance, I quickly realized aluminum has a personality of its own. It’s different from steel. It behaves differently.
It melts faster. It can be fussy about cleanliness. Once you learn the steps and use the right process, welding aluminum becomes second nature.

Image by web
If you’re sitting beside me right now and asking this question, let me walk you through everything I’ve learned about it.
If you’re new to welding or trying to sharpen your aluminum welding skills, this guide is for you. We’ll cover the best methods, preparation steps, tips, tools, and even common mistakes to avoid.
Why Aluminum Welding Is Different from Steel
Before we get into the how-to, it’s important to understand what makes aluminum a unique material. Unlike steel, aluminum has a much lower melting point.
It also conducts heat faster, which means it can melt through or warp easily if you’re not careful. It doesn’t change color much before it melts, so you need to watch your technique closely.
Another thing is the oxide layer. Aluminum forms a thin, invisible oxide coating on its surface that melts at a much higher temperature than the base metal. If you don’t clean that off, your welds won’t bond well, and they might crack or break.
So, yes—it’s a bit trickier than steel, but with the right steps, you can get strong, clean welds every time.
Choosing the Right Welding Process for Aluminum
There’s more than one way to weld aluminum, but the most common and reliable methods are TIG welding and MIG welding. Let’s take a look at both so you can decide what works best for your project.
| Welding Method | Best For | Pros | Cons |
|---|---|---|---|
| TIG (GTAW) | Thin to medium aluminum pieces | Clean and precise welds | Slower process, needs more skill |
| MIG (GMAW) | Medium to thick aluminum pieces | Faster, easier for beginners | Not as precise, more splatter |
TIG Welding (Tungsten Inert Gas)
TIG is my go-to when I want a beautiful finish. It’s precise, quiet, and gives you full control over the arc. You use a filler rod while keeping the tungsten tip from touching the metal. It does require more skill and patience, but the welds are super clean.
This method works best on thinner pieces or when appearance matters, like for bikes, boats, or aluminum piping.
MIG Welding (Metal Inert Gas)
MIG is easier to learn, and it’s faster, too. It uses a wire-fed gun and is great for thicker aluminum parts like frames or structural components. If you’re in a rush or working on big pieces, MIG might be your best friend.
You’ll need a spool gun or a push-pull gun setup to feed the soft aluminum wire properly, because it tends to bird-nest if you’re not using the right equipment.
Cleanliness is Key: Surface Prep for Aluminum
Here’s a little secret—most aluminum welding problems start before you strike an arc. They come from poor preparation. Aluminum needs to be very clean for a good weld. Here’s what I always do:
- Degrease the surface: Use acetone or a dedicated aluminum cleaner to wipe off oil, dirt, or grease.
- Remove the oxide layer: Use a stainless steel wire brush made only for aluminum. Never use a brush that touched steel—it can contaminate the surface.
- Dry the metal: Moisture leads to porosity in your weld, so always work on dry metal.
- Clamp the pieces well: Secure your work tightly before welding. Aluminum moves when heated, so good clamping prevents shifting and distortion.
It takes a few extra minutes, skipping this step is asking for weak, messy welds.
Choosing the Right Filler Material
You can’t just grab any filler rod and start welding. Aluminum has many different grades, and not all of them play well together. Here’s a simple cheat sheet I’ve used over the years:
| Base Aluminum Alloy | Common Filler Rods | Notes |
|---|---|---|
| 6061 | 4045, 5356, 4043 | 4043 is easier to use; 5356 is stronger |
| 5052 | 5356 | Stronger, corrosion-resistant welds |
| 1100 or pure | 1100, 4043 | Soft, workable joints |
If you’re unsure, always check with a compatibility chart or the supplier. The right filler gives you a solid weld, while the wrong one can crack after cooling.
Shielding Gas for Aluminum Welding
Shielding gas protects the weld pool from contamination. With aluminum, pure argon is usually your best bet. It gives a stable arc and good penetration.
For thicker aluminum, sometimes I mix a bit of helium in with the argon. Helium increases heat, which helps on thicker joints. But for most jobs, 100% argon does the trick just fine.
Make sure your gas flow rate is right—too much or too little can ruin your weld. I usually go for around 15 to 20 CFH (cubic feet per hour) for TIG, and around 20 to 25 CFH for MIG.
How to Set Up Your Welder for Aluminum
Getting your machine set up correctly is half the battle. Here’s how I do it:
For TIG Welding:
- Use AC (alternating current)
- Set high frequency start
- Balance around 70% cleaning / 30% penetration (adjust depending on oxide thickness)
- Use a pointed tungsten tip for better arc control
- Match filler rod size to your weld thickness
For MIG Welding:
- Use a spool gun for aluminum wire
- Set voltage and wire speed based on thickness
- Use DCEP polarity (Direct Current Electrode Positive)
- Keep wire feed steady to avoid burn-back or bird-nesting
If you’re using pre-set machines, many have aluminum modes already programmed in. Don’t be afraid to tweak the settings based on what you see happening on the weld.
Practice the Right Technique
Once everything is prepped, it’s time to actually start welding. Here are a few personal tips I always follow when welding aluminum to aluminum:
- Keep a steady hand: Aluminum welds are fast. You need consistent travel speed and a steady arc.
- Watch the puddle, not the arc: Look where the metal is melting, not just the arc. This helps you avoid burn-through.
- Control your heat: Too much heat can warp or burn through aluminum. Pulse settings help control this.
- Push, don’t pull: Always push the torch when welding aluminum. It keeps the shielding gas ahead of the weld and gives a cleaner result.
- Tack weld first: Always tack your pieces in place before going for the full seam. It prevents movement and keeps things aligned.
It’s okay if the first few beads aren’t pretty. Keep practicing, and your hands will develop the muscle memory over time.
Mistakes When Welding Aluminum
Everyone makes mistakes—I sure did when I started. But here are a few to look out for so you don’t have to learn the hard way:
- Skipping the cleaning step – This causes cracking and weak welds.
- Using the wrong filler rod – It might look okay, but it won’t last.
- Using a dirty wire brush – Cross-contamination can mess up your weld.
- Wrong shielding gas flow – Either porosity or wasted gas.
- Wrong technique – Pulling the torch instead of pushing can leave a rough, weak weld.
Every mistake is a lesson. Aluminum takes time to master, but once you get it, it’s incredibly rewarding.
When to Use Preheating
Most of the time, I don’t need to preheat aluminum. But for thicker pieces—especially over half an inch—it’s a good idea. Preheating between 200°F to 300°F helps prevent cracking and improves penetration.
You can use a propane torch, heat gun, or even an oven for small parts. Just don’t overdo it—aluminum heats fast and doesn’t give much warning before it melts.
Welding Aluminum Sheet Metal
Thin aluminum sheet is tricky. It melts fast and warps easily. Here’s how I approach it:
- Use TIG welding with a small tungsten tip
- Keep amps low and travel fast
- Use pulse welding mode if your machine has it
- Clamp everything tightly to avoid movement
- Use a copper backing bar if possible to absorb heat
Even small mistakes can blow holes in sheet metal, so go slow, stay focused, and work in short bursts if needed.
Welding Cast Aluminum
Cast aluminum can be a headache. It has more impurities, and it’s often old or dirty. Here’s what I do:
- Clean thoroughly—twice if needed
- Use 4047 filler for better fluidity and crack resistance
- Preheat the part to reduce stress
- Use AC TIG for better cleaning action
Sometimes, no matter how well you prep, cast aluminum just doesn’t weld perfectly. In that case, I try to manage expectations. A repair might not look beautiful, but it can still be functional.
My Final Thoughts on Welding Aluminum to Aluminum
Welding aluminum to aluminum isn’t something you master overnight, but once you understand its behavior and respect the preparation steps, you’ll start to see the results you want.
Be patient with yourself. Start with simple joints and clean pieces, then move to more complex projects as you grow.
I’ve been welding aluminum for years now, and I still learn something new every time. It’s a craft that rewards attention to detail and consistent practice. And when you lay down that perfect bead on a shiny piece of aluminum, it feels amazing.
Take your time, follow the steps, and don’t be afraid to make a few mistakes along the way. That’s how you learn.
Frequently Asked Questions
What’s the easiest way to weld aluminum for beginners?
MIG welding with a spool gun is usually the easiest method for beginners. It’s faster and more forgiving than TIG.
Do I need a special welder for aluminum?
Yes, for best results you need a welder with AC TIG capabilities or a MIG welder with a spool gun setup.
Can you weld aluminum without gas?
No, shielding gas is essential to protect the weld from contamination. Pure argon is usually used for aluminum.
Why does my aluminum weld keep cracking?
Cracking usually comes from poor cleaning, using the wrong filler rod, or not preheating thick sections properly.
Can I weld aluminum with a stick welder?
You can, but it’s very difficult and not recommended for beginners. It’s hard to control, and the results aren’t as clean.
What filler rod should I use for 6061 aluminum?
4043 and 5356 are both common for 6061. 4043 is easier to use, while 5356 is stronger.
How can I avoid porosity in my aluminum welds?
Clean thoroughly, use fresh shielding gas, and avoid moisture or oil contamination on your base metal.
Why is my aluminum weld black and dirty?
That usually means your gas coverage isn’t right, or your tungsten electrode is contaminated.


